How do you draw a balloon step by step?
Short answer
Drawing a balloon involves creating an oval shape, adding a small knot at the base, and attaching a trailing string. By mastering basic geometric forms and light shading, you can produce a realistic illustration. This process relies on layering simple shapes and applying highlights to suggest a glossy, three-dimensional surface texture.
On this page
How to draw a basic balloon shape
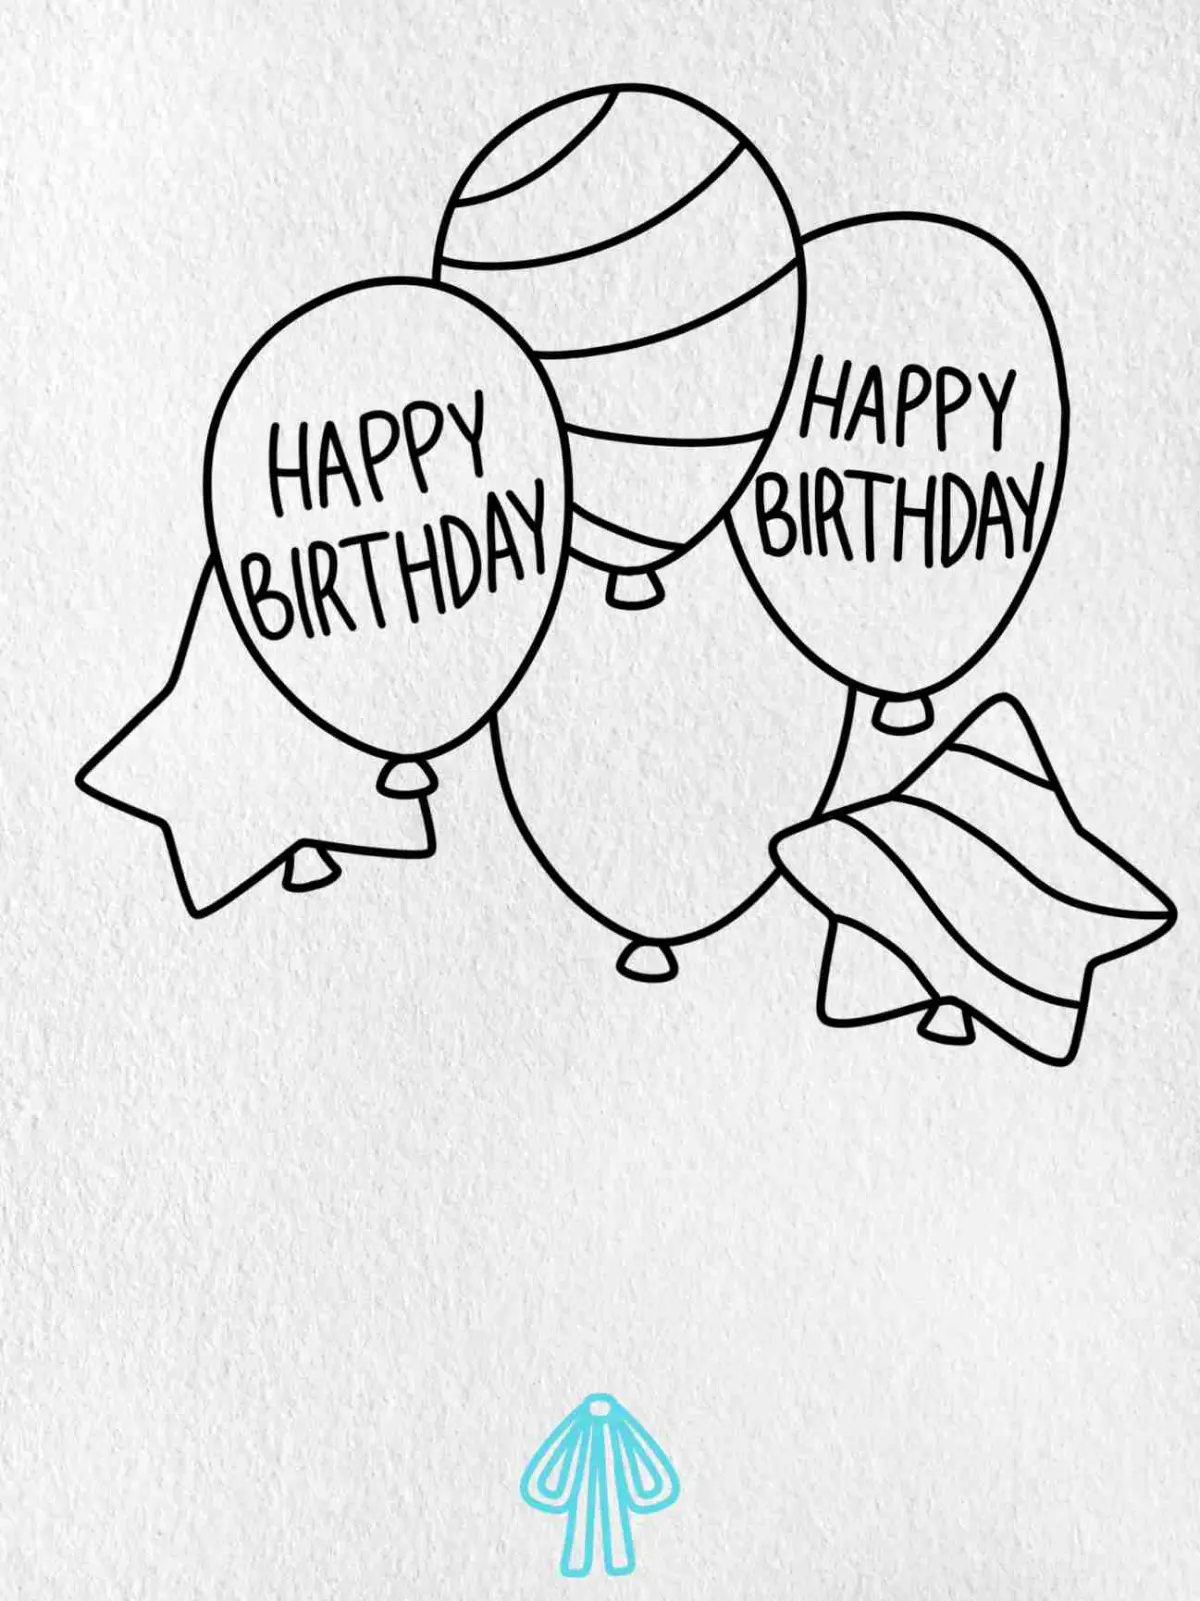
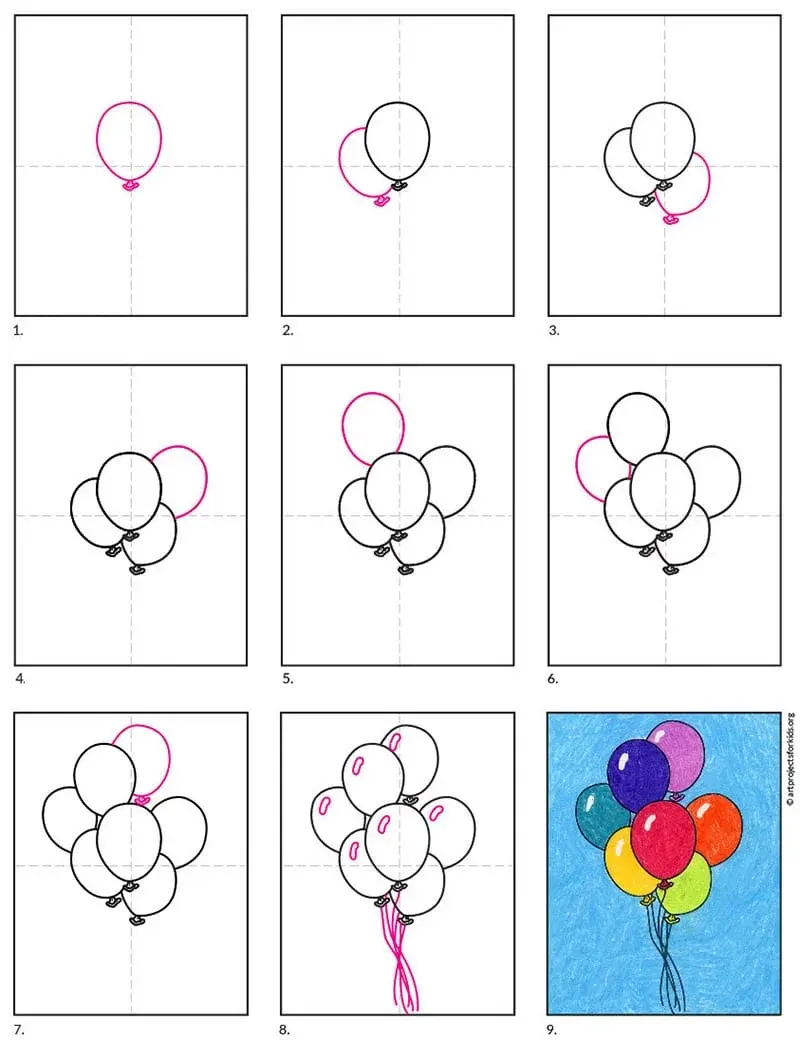
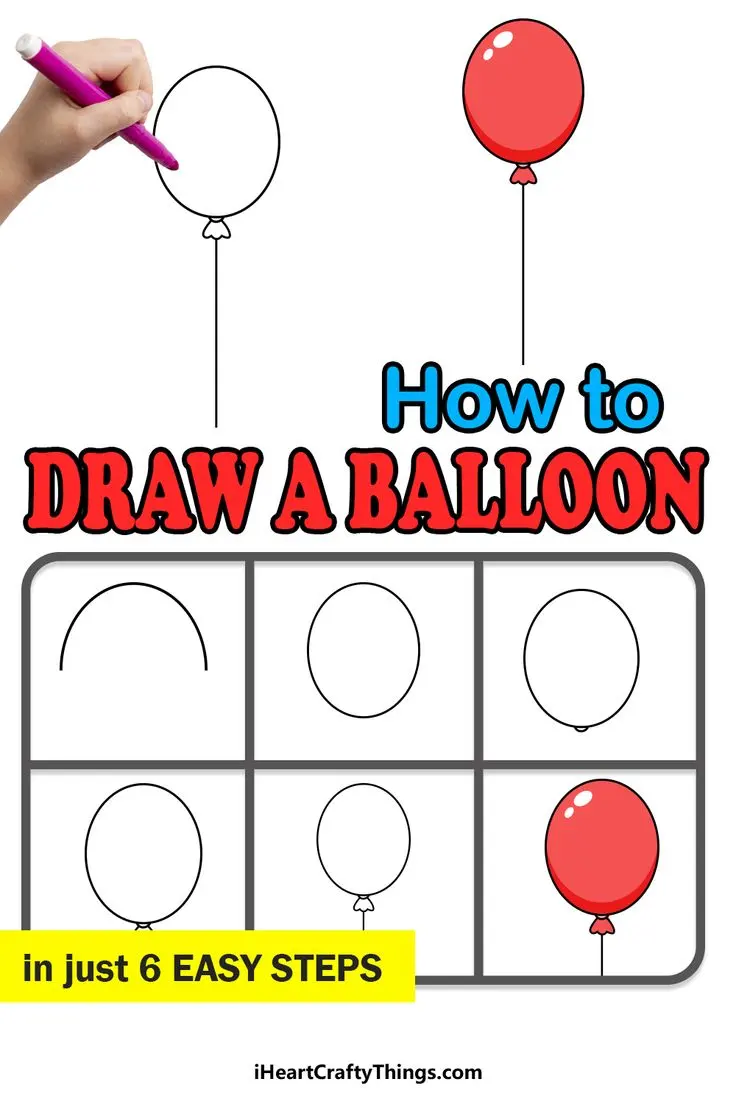
The foundation of any realistic balloon drawing is a perfect oval or teardrop shape. Start by lightly sketching a vertical oval, ensuring the top is slightly broader than the bottom to mimic the way gravity pulls on the rubber. Once the primary shape is established, add a small, inverted triangle or a "D" shape at the bottom center to represent the knot where the balloon is tied. This small detail is crucial because it grounds the object and gives it a sense of scale.
When refining your outline, use smooth, continuous strokes to keep the edges looking soft and flexible. Avoid jagged lines, as balloons are made of thin, elastic material that stretches into gentle curves. If you are struggling to maintain symmetry, lightly draw a vertical center line through your oval as a guide, then erase it once your shape is finalized. This simple structural approach ensures your balloon looks balanced rather than lopsided.
How to add depth and shading
To make your balloon appear three-dimensional, you must account for how light interacts with its smooth surface. Identify a single light source, such as a lamp to the top left, and imagine a bright white highlight on the opposite side of the curve. Use a circular or oval motion to shade the areas furthest from this highlight, gradually transitioning from dark tones to lighter ones. This technique, known as gradient shading, creates the illusion of volume and roundness.
Effective shading follows these specific steps:
- Determine the direction of your light source to establish where the highlight will be placed.
- Apply a light base layer of graphite or color across the entire balloon surface.
- Darken the side opposite the light source using firm pressure, then blend inward toward the highlight.
- Use an eraser to lift a small, crisp shape near the top to serve as the primary reflection point.
Best tools for drawing balloons
The choice of medium significantly impacts the final result, especially when trying to capture the translucent quality of latex. Graphite pencils are excellent for beginners because they allow for precise control over shading and tonal values. For those seeking a more vibrant look, colored pencils or soft pastels work well to create smooth transitions between colors. Markers can also be effective, though they require a steady hand to avoid streaks that might ruin the illusion of a seamless surface.
Regardless of your chosen tool, consider the following equipment for the best results:
- A set of drawing pencils ranging from 2H for light sketches to 4B for deep shadows.
- A kneaded eraser, which can be molded to lift small highlights or soften harsh lines.
- Smooth-finish paper, as textured surfaces can cause unwanted grainy effects on the balloon's glossy skin.
- A blending stump or a soft cloth to smooth out transitions between light and shadow colors.
Common mistakes when drawing balloons
One of the most frequent errors is neglecting the "knot" at the bottom, which makes the object look like a floating egg rather than a balloon. Another common mistake is placing the highlight in the center of the balloon; a central highlight often makes the object look flat or like a solid ball. Instead, place the highlight slightly off-center to follow the curvature of the sphere. Additionally, many beginners draw the string as a perfectly straight line, which ignores the natural weight and tension of the material.
To improve your technique, keep these tips in mind:
- Avoid drawing a perfectly straight string; add a slight curve or a gentle "S" shape to indicate movement or gravity.
- Do not outline the highlight with a dark border, as this creates a harsh, artificial look that breaks the illusion of light.
- Ensure the knot is proportional; if it is too large, it distracts from the main body of the balloon.
- Check your perspective to ensure the balloon appears to be floating in space rather than sitting on a flat surface.
How to draw balloon strings and ribbons
The string is the final element that provides context and movement to your drawing. A string should never be a single, stiff line; it should flow naturally from the knot, often curving downward to suggest the weight of the balloon. If you want to add more detail, draw the string as a thin, slightly wavy line that tapers off as it moves further away from the knot. You can also add a small loop or a bow at the base of the balloon to add character and a sense of realism.
When drawing multiple balloons, vary the length and curvature of the strings to create a dynamic composition. If the balloons are drifting in the wind, ensure all the strings lean in the same direction to maintain consistency. You can also add a slight thickness to the string near the knot, tapering it to a fine point at the bottom to suggest depth. By focusing on these subtle details, you transform a simple shape into a lively, convincing illustration that captures the airy essence of a real balloon.
Key facts
- A standard balloon shape is essentially an elongated teardrop or an oval with a small inverted triangle at the base.
- Use a light pencil grip to sketch the initial outline, as this makes erasing guidelines easier later.
- Adding a small white oval highlight on the side of the balloon creates the illusion of a glossy, reflective surface.
- The "knot" at the bottom should be drawn as a small, rounded triangle or a tiny circle attached to the main body.
- Draw a thin, slightly curved line descending from the knot to represent the string, which adds a sense of movement.
- Varying the size and overlapping multiple balloons can create a more dynamic and professional-looking illustration.
The bottom line
Drawing a balloon is a straightforward process that relies on mastering basic geometric shapes and lighting effects. By starting with a simple oval and adding a small knot, you establish the foundation. Enhancing the drawing with a reflective highlight and a slightly curved string provides the necessary detail to make your illustration appear three-dimensional, vibrant, and realistic. Practice these steps to improve your artistic control.
People also ask
What is the best type of pencil to use for sketching?
An HB or 2B pencil is ideal because it provides a balance between darkness and ease of erasure. These grades allow you to build up light outlines before committing to permanent ink or darker shading.
How do I make the balloon look three-dimensional?
You can achieve depth by applying darker shading along one side of the balloon and the bottom. Keep the area near the top-center lighter to simulate the way light hits a curved, shiny surface.
Should I draw the string straight or curved?
A perfectly straight string often looks stiff and unnatural. Adding a slight curve or a gentle "S" shape suggests that the balloon is drifting in the wind or moving.
How do I draw the highlight on the balloon?
Leave a small, uncolored circular or oval space near the upper edge of the balloon. This white space mimics the reflection of light, which is essential for making the object appear inflated and smooth.
Is it better to draw the knot before or after the balloon?
It is usually easier to draw the main oval shape of the balloon first. Once the body is complete, you can anchor the knot at the bottom center to ensure the proportions look balanced.
What is a common mistake when drawing balloon strings?
Many people draw the string too thick, which makes it look heavy and rigid. Use a very light, thin line to ensure the string looks delicate and realistic relative to the balloon itself.
This answer was created with the help of AI research tools and reference sources. Spotted an error? Let us know — we correct mistakes quickly. See our editorial policy.