How do you arrange a gallery wall?
Short answer
Arrange a gallery wall by selecting a cohesive theme, mapping the layout on the floor first, and maintaining consistent spacing between frames. Balance visual weight by distributing larger pieces evenly, then use paper templates to test positions on the wall before driving nails to ensure a professional, curated result.
On this page
How to plan a gallery wall layout
Planning is the most critical phase of creating a gallery wall. Before making any marks on your wall, gather all your art, photographs, and decorative objects. Lay them out on a large floor space to experiment with different configurations. This allows you to visualize the composition without damaging your walls. Focus on creating a balanced distribution of shapes, sizes, and colors.
When arranging your pieces, consider the "anchor" item, which is typically the largest or most visually striking piece. Place this item near the center of your planned arrangement and build outward. You can choose between a symmetrical grid, which offers a formal and clean look, or an eclectic organic arrangement for a more relaxed aesthetic. Use these steps to finalize your plan:
- Measure the total wall area available for your display.
- Arrange your items on the floor within a taped-off area that matches your wall dimensions.
- Take a photograph of your favorite arrangement to use as a reference during installation.
- Trace each frame onto kraft paper and cut out the shapes to create templates.
Best tools for gallery wall installation
Having the right equipment ensures that your gallery wall looks professional rather than haphazard. A laser level is an invaluable tool for ensuring that your frames are perfectly aligned, especially if you are attempting a grid layout. If a laser level is not available, a standard bubble level is a necessary alternative to prevent crooked frames.
You will also need a hammer, a measuring tape, and appropriate hardware for your wall type. Use painter's tape to secure your paper templates to the wall, as it will not damage the paint or leave a sticky residue. A pencil is essential for marking the exact spot where the nail should go. Consider these items for your toolkit:
- Painter's tape for temporary placement.
- A bubble level or laser level for alignment.
- Kraft paper or newspaper for creating templates.
- A pencil and eraser for marking.
- A hammer and appropriate wall anchors or nails.
How to space a gallery wall
Consistency is the secret to a polished gallery wall. Most professional designers recommend a standard spacing of two to three inches between frames. If the spacing is too wide, the collection will look disconnected; if it is too narrow, the wall may feel cluttered and chaotic. Maintain this uniform gap throughout the entire arrangement to create a cohesive visual flow.
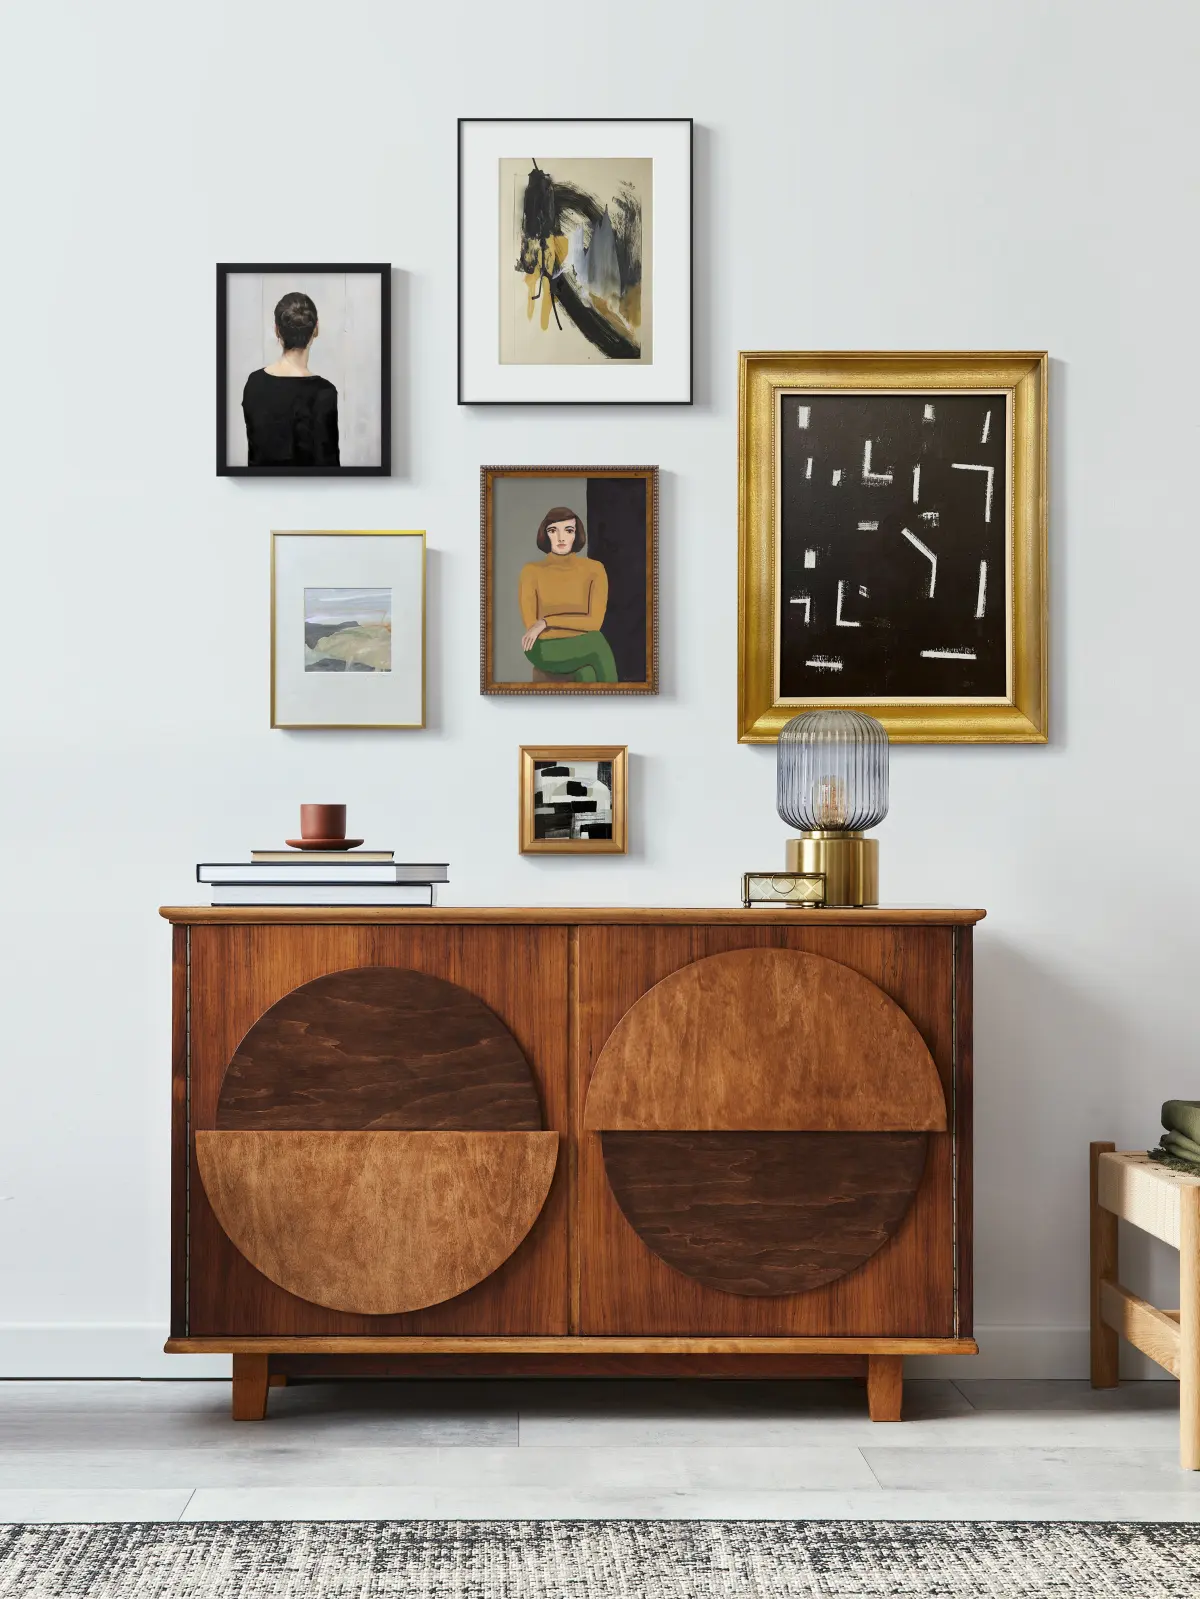
When working with frames of varying sizes, the spacing becomes even more important. Align the centers of the frames or align their tops and bottoms to create a sense of order. If you are mixing different frame styles, such as wood, metal, and ornate gold, ensure that the spacing remains identical to unify the disparate textures. By keeping the negative space constant, the eye can move easily across the collection without feeling overwhelmed by the variety of images.
Common mistakes when hanging art
One of the most frequent errors is hanging art too high. Many people place the center of their gallery wall at eye level, but the center of the entire arrangement should generally sit about 57 to 60 inches from the floor. This height mimics the standard gallery hanging practice used in museums and professional exhibitions, ensuring the art is accessible to the viewer.
Another common mistake is failing to account for the hardware on the back of the frame. The distance from the top of the frame to the hanging wire or hook can vary significantly between pieces. Always measure this distance carefully before marking your wall. Avoid these common pitfalls to ensure your project succeeds:
- Hanging frames too far apart, which breaks the visual connection.
- Using the wrong wall anchors for heavy frames, which can lead to damage.
- Ignoring the lighting in the room, which may cause glare on glass-covered art.
- Failing to step back and view the wall from across the room during the process.
How to maintain a gallery wall
Once your gallery wall is installed, maintenance is relatively simple but requires attention to detail. Over time, frames may shift slightly due to vibrations or temperature changes in the home. Periodically check your frames with a level to ensure they have not tilted. If you notice a frame slipping, a small piece of removable museum putty placed behind the bottom corner can hold it firmly in place against the wall.
Dusting is also essential to keep your art looking vibrant. Use a soft, microfiber cloth to gently wipe the frames and glass, being careful not to push against the wall too hard. If you have chosen to include organic items or open canvases, ensure they are kept away from direct sunlight to prevent fading. By performing these small, routine checks, you preserve the integrity of your display and ensure that your gallery wall remains a beautiful, long-term focal point in your home.
Key facts
- Aim for a consistent gap of 2 to 3 inches between frames to maintain visual cohesion.
- Lay out your arrangement on the floor first to experiment with spacing before putting holes in the wall.
- Use a central focal point, such as a large piece of art or a mirror, to anchor the display.
- Keep the center of the entire gallery wall at eye level, typically 57 to 60 inches from the floor.
- Mix frame styles or colors intentionally, or use matching frames to create a more formal, uniform aesthetic.
- Trace each frame onto kraft paper, cut out the shapes, and tape them to the wall to test your layout.
The bottom line
Creating a gallery wall is an exercise in balance and intentional design. By anchoring your layout with a central piece, maintaining consistent spacing, and testing your arrangement on the floor or with paper templates, you can transform any blank wall into a curated display. Focus on visual harmony rather than rigid perfection to ensure your collection reflects your personal style while enhancing the room's overall aesthetic appeal.
People also ask
Should I use a level when hanging my gallery wall?
Yes, a level is essential to ensure that individual frames do not appear crooked. Even a slight tilt can become magnified when multiple pieces are grouped together.
How do I mix different types of art, such as photos and paintings?
You can combine various media by balancing their visual weight. Place heavier, darker pieces toward the bottom or center to prevent the wall from feeling top-heavy.
Is it better to have a symmetrical or asymmetrical arrangement?
Symmetrical arrangements offer a clean, formal look, while asymmetrical layouts feel more organic and relaxed. Choose the style that best complements the surrounding furniture and room decor.
How many pieces do I need for a good gallery wall?
Start with at least three to five pieces to create a meaningful impact. There is no maximum limit, provided the collection remains visually balanced within your designated wall space.
Can I hang a gallery wall in a small room?
Absolutely, as a well-planned gallery wall can actually make a small room feel larger by drawing the eye upward. Use smaller frames and lighter colors to avoid overwhelming the space.
What is the best way to hang frames without damaging the wall?
Adhesive strips are excellent for lighter frames and allow for easy repositioning without nails. For heavier items, traditional picture hooks are more secure and cause minimal wall damage.
This answer was created with the help of AI research tools and reference sources. Spotted an error? Let us know — we correct mistakes quickly. See our editorial policy.