How do you paint clouds in watercolor?
Short answer
Painting clouds in watercolor requires a "negative painting" approach or a "wet-on-wet" technique. By applying water to the paper first and dropping in pigment, you allow the paint to bloom into soft, diffused shapes. You then lift out highlights or deepen shadows to create the illusion of depth and volume.
On this page
How to paint realistic clouds
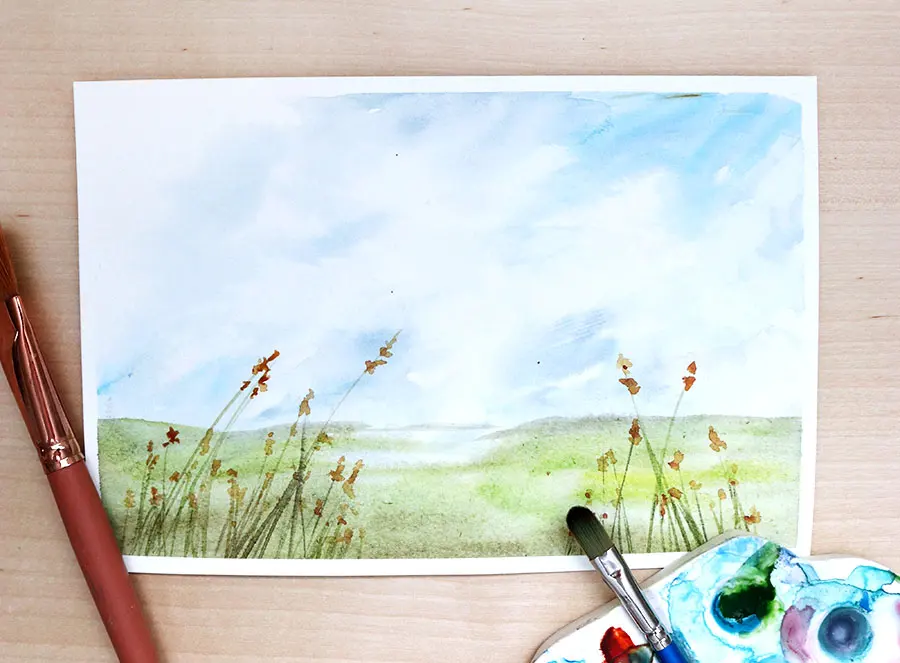
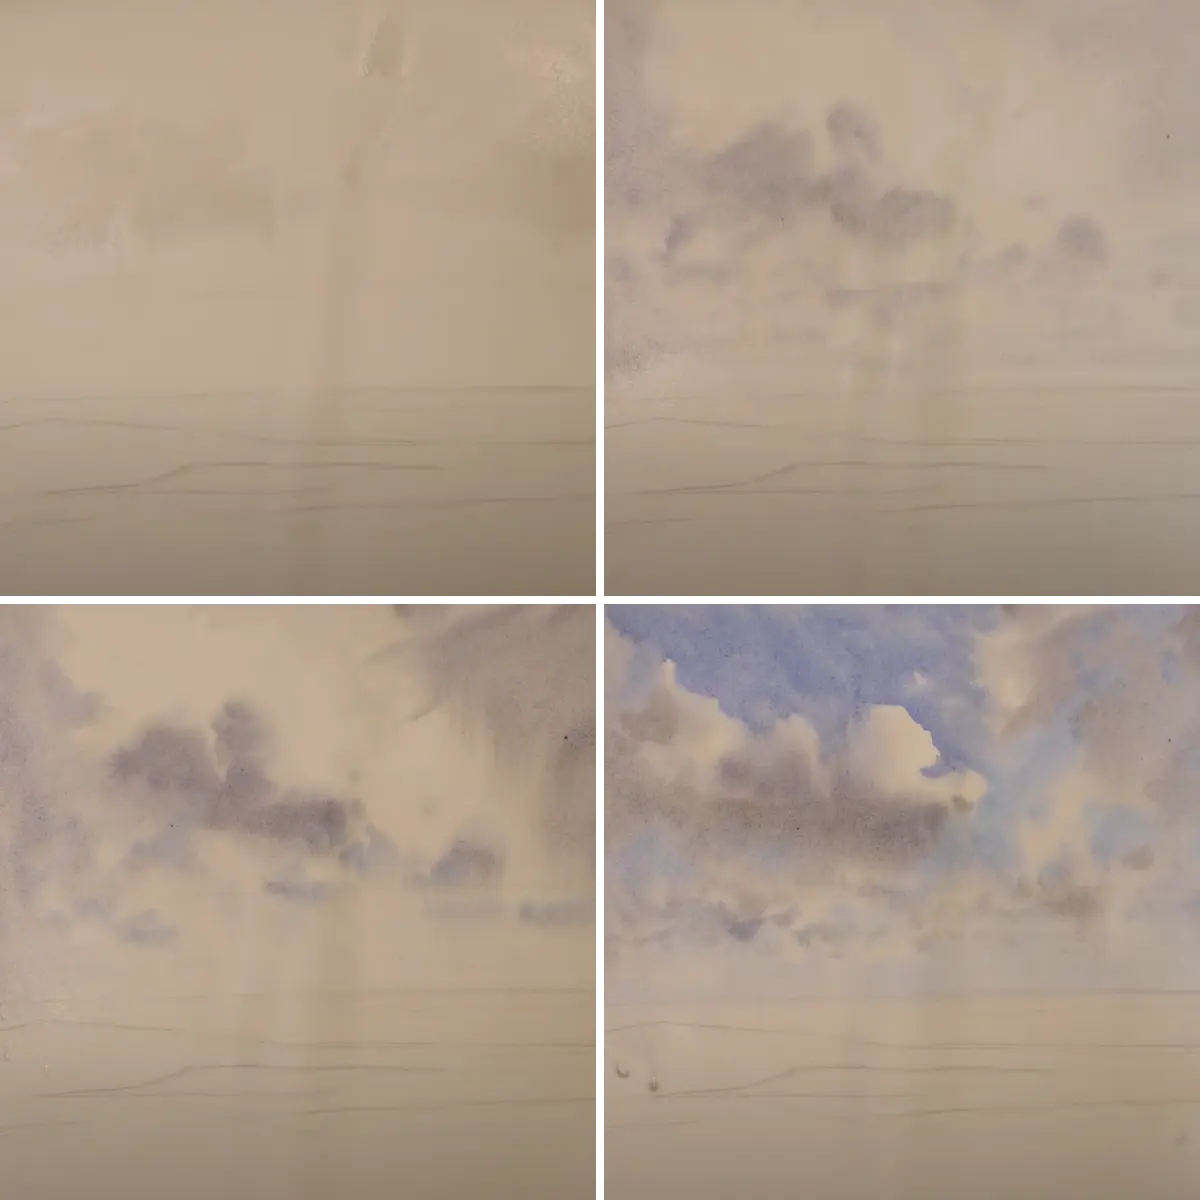
The most effective method for painting clouds is the wet-on-wet technique, which mimics the soft, ephemeral nature of vapor. Begin by dampening your watercolor paper with clean water using a large flat brush, ensuring the surface is glistening but not pooling. Once the paper is prepared, load your brush with a diluted mixture of blue, such as cerulean or cobalt, and lightly suggest the sky around the cloud shapes.
As the paint settles, it will naturally bleed into the damp areas, creating soft edges that define the cloud's perimeter. To add volume, drop in a slightly thicker, darker pigment—a mix of ultramarine and a touch of burnt sienna—along the undersides of the clouds. This creates the necessary shadow that gives the formation a three-dimensional quality. Allow the paper to remain undisturbed while it dries to prevent harsh, unwanted lines.
Best watercolor techniques for beginners
For those new to the medium, mastering the control of water-to-pigment ratio is essential. If your brush is too dry, the edges of your clouds will appear jagged and artificial. Conversely, if the paper is too wet, the pigment will spread uncontrollably, resulting in a muddy mess that lacks the structural integrity of distinct cloud formations.
- Prepare your paper by applying an even layer of clear water.
- Mix your sky colors on a palette before touching the paper.
- Apply the pigment, leaving white areas of the paper untouched for the brightest highlights.
- Use a clean, damp brush to soften any edges that appear too sharp while the paint is still wet.
- Let the first layer dry completely before adding secondary shadows or details.
How to create depth in clouds
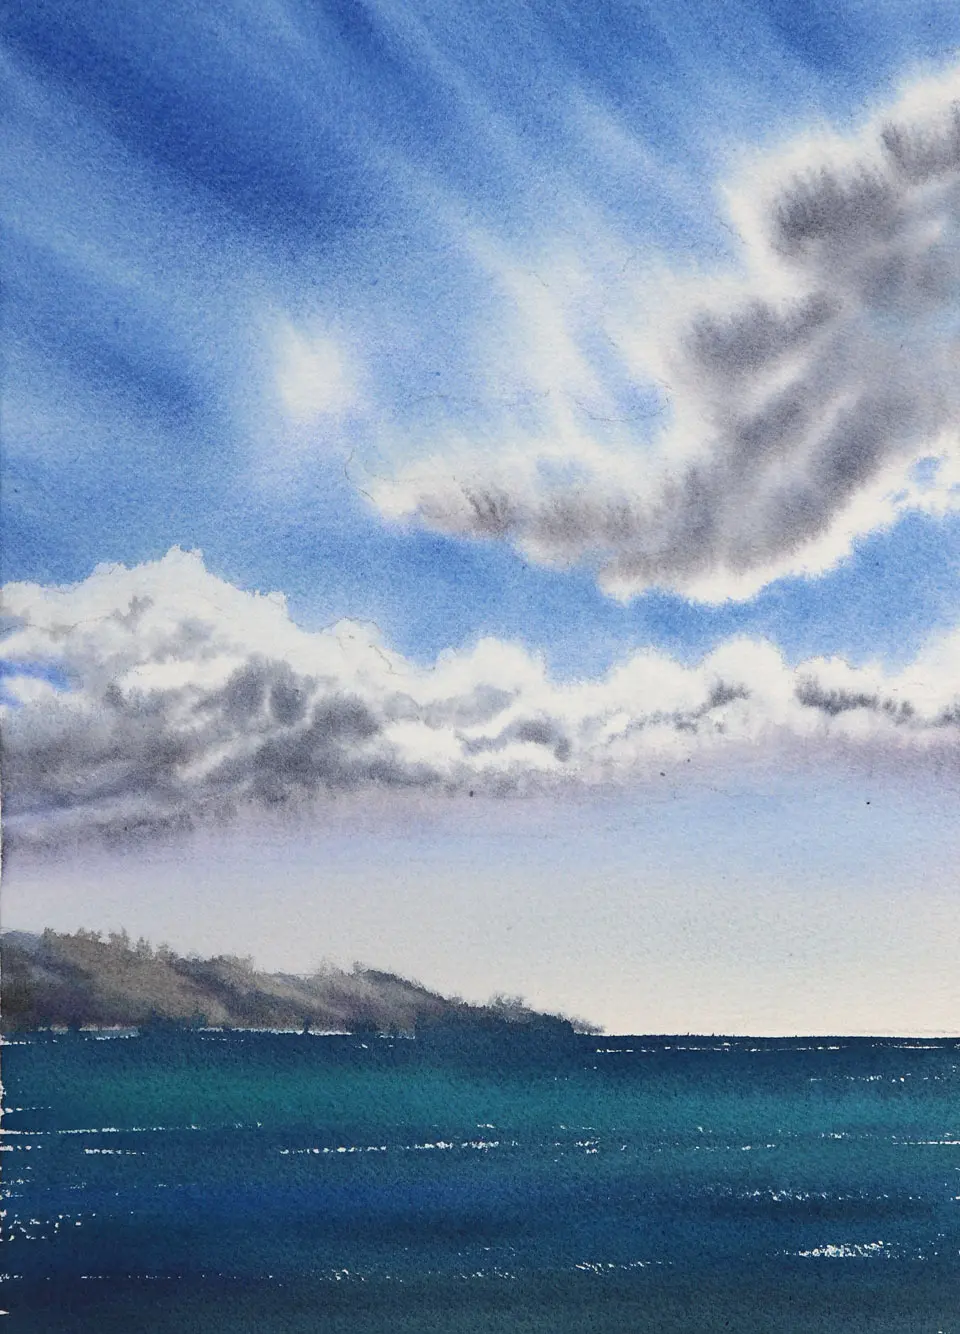
Depth is achieved by manipulating the contrast between light and shadow. Clouds are not merely white; they contain subtle shifts in color, including grays, purples, and even warm oranges during sunrise or sunset. By layering these colors, you build a sense of atmospheric perspective, where clouds closer to the viewer appear more detailed and saturated than those on the horizon.
- Use cooler, paler colors for clouds in the distance to push them back into the horizon.
- Apply warmer, more intense pigments to clouds in the foreground to bring them forward.
- Reserve the purest white of the paper for the highest points of the cloud where sunlight hits directly.
- Use a lifting technique with a dry, stiff brush to remove paint and reveal highlights if you accidentally cover too much paper.
Why clouds look muddy in watercolor
Muddy clouds often result from overworking the paper or mixing too many complementary colors together. When you layer blue and orange repeatedly, the pigments neutralize into a dull brown or gray. To avoid this, keep your brush strokes decisive and limit the number of times you go back over a specific area while it is still damp.
Another common issue is using low-quality paper that cannot withstand multiple washes. Cellulose paper tends to pill or tear when wet, which ruins the texture of the clouds. Always opt for 100% cotton cold-press paper, which holds moisture longer and allows for smoother transitions. If you find your work becoming muddy, stop immediately and wait for the paper to dry entirely before attempting to lift or glaze over the area with a fresh, clean wash.
Common mistakes when painting clouds
One frequent error is painting clouds as isolated, static objects rather than part of a larger sky composition. Beginners often draw rigid outlines around clouds, which makes them look like cut-out shapes pasted onto the sky. Instead, focus on the negative spaces between the clouds, as these shapes are just as important as the clouds themselves for creating a natural, flowing composition.
- Avoid outlining clouds with a pencil, as these marks are difficult to hide under transparent watercolor.
- Do not use opaque white paint to fix mistakes, as it often looks chalky and lacks the luminosity of the paper.
- Refrain from using too much water, which causes "cauliflower" blooms that distract from the intended soft form.
- Remember to vary the size and shape of your clouds to avoid a repetitive, cartoon-like appearance across the horizon.
By focusing on the interaction between light and the texture of the paper, you can capture the fleeting beauty of the sky with confidence and grace.
Key facts
- Use the "negative painting" technique by painting the sky around the cloud shapes rather than painting the clouds themselves.
- Apply clean water to the paper before adding pigment to create soft, diffused edges that mimic the airy nature of cumulus clouds.
- Lift wet pigment with a clean, damp synthetic brush or a paper towel to create subtle highlights and wispy cloud edges.
- Use a limited palette of cool blues, such as cerulean or cobalt, to ensure the sky remains transparent and luminous.
- Work from light to dark, preserving the white of the paper for the brightest parts of the clouds to maintain maximum brilliance.
- Avoid overworking the paper, as watercolor loses its freshness and becomes muddy if you brush over the same area too many times.
The bottom line
Mastering watercolor clouds requires a balance of planning and spontaneity. By prioritizing negative space and maintaining the paper’s natural brightness, you can capture the ethereal quality of the sky. Focus on soft, wet-in-wet transitions to mimic natural cloud formations. With practice, you will learn to trust the water to do the work, resulting in light, airy paintings that feel authentic rather than forced or overworked.
People also ask
Should I use masking fluid to keep my clouds white?
Masking fluid can create harsh, unnatural edges that look stiff in a landscape. It is generally better to paint around the cloud shapes or lift color while the paint is still damp.
What type of paper is best for painting clouds?
Cold-press watercolor paper is ideal because its slight texture helps catch pigment and creates the soft, granular look often found in atmospheric skies. Avoid hot-press paper, as it is too smooth and makes it difficult to achieve soft transitions.
How do I prevent hard edges from forming on my clouds?
Keep the surrounding area damp while you work, a technique known as "wet-in-wet." If an edge starts to dry too quickly, gently soften it by running a clean, damp brush along the perimeter.
Can I add white paint to make clouds brighter?
While artists like J.M.W. Turner occasionally used opaque white, it is best to rely on the white of the paper for the brightest highlights. Adding white gouache or acrylic can make the painting look chalky and opaque rather than transparent.
How do I paint storm clouds?
Use darker, more saturated mixtures of Payne’s Gray, ultramarine, and burnt sienna. Apply these colors while the paper is wet to allow the dark pigments to bleed into the lighter areas, creating a sense of movement and weight.
Why do my clouds look like flat shapes?
This often happens when there is no variation in color or value within the cloud. Add subtle shadows using a diluted mix of blue and violet to give the clouds three-dimensional volume and depth.
This answer was created with the help of AI research tools and reference sources. Spotted an error? Let us know — we correct mistakes quickly. See our editorial policy.