How do you draw reflections?
Short answer
Draw reflections by identifying the horizon line and mirroring the object’s shape vertically. Use a lighter value for the reflection than the original subject to account for light absorption. Maintain consistent perspective by aligning the reflection directly beneath the object, ensuring that vertical lines remain straight and parallel to the surface plane.
On this page
How to draw reflections on water
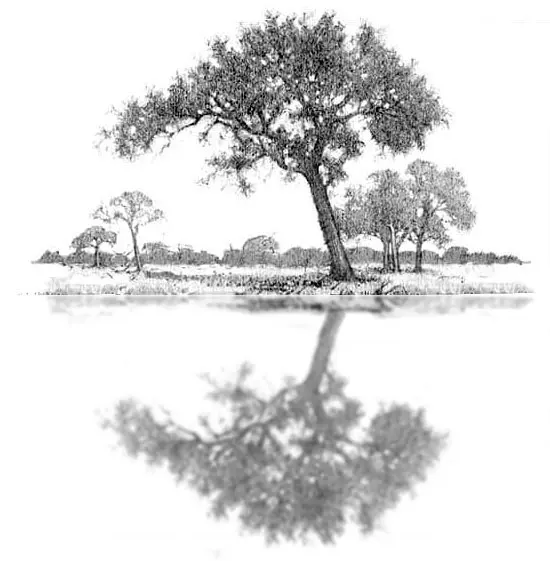
Reflections on water are rarely perfect mirrors because the surface is often disturbed by ripples, waves, or currents. To draw these, start by sketching the object above the water line, then replicate its silhouette below the line in a slightly distorted, elongated fashion. Use horizontal strokes to suggest the water's surface, breaking up the reflection's edges to mimic the movement of the liquid.
Achieving realism requires careful observation of how light interacts with the water's surface. If the water is calm, the reflection will appear sharp and clear, almost like glass. When the water is turbulent, the reflection fragments into smaller, elongated shapes that follow the direction of the ripples. Follow these steps to capture the effect:
- Establish the horizon line where the water meets the shore or distant scenery.
- Draw the primary object, noting its vertical distance from the water's edge.
- Mirror the object downward, keeping the width consistent while stretching the vertical proportions.
- Apply horizontal lines across the reflection to simulate the texture of the water.
Why reflections look different from the original
The primary reason a reflection differs from the source is the loss of light intensity during the reflection process. Surfaces like water, polished metal, or glass absorb a portion of the light that hits them, resulting in a reflection that is naturally darker and less saturated than the object itself. Furthermore, the angle of the viewer changes how much of the object is visible, often creating a perspective shift.
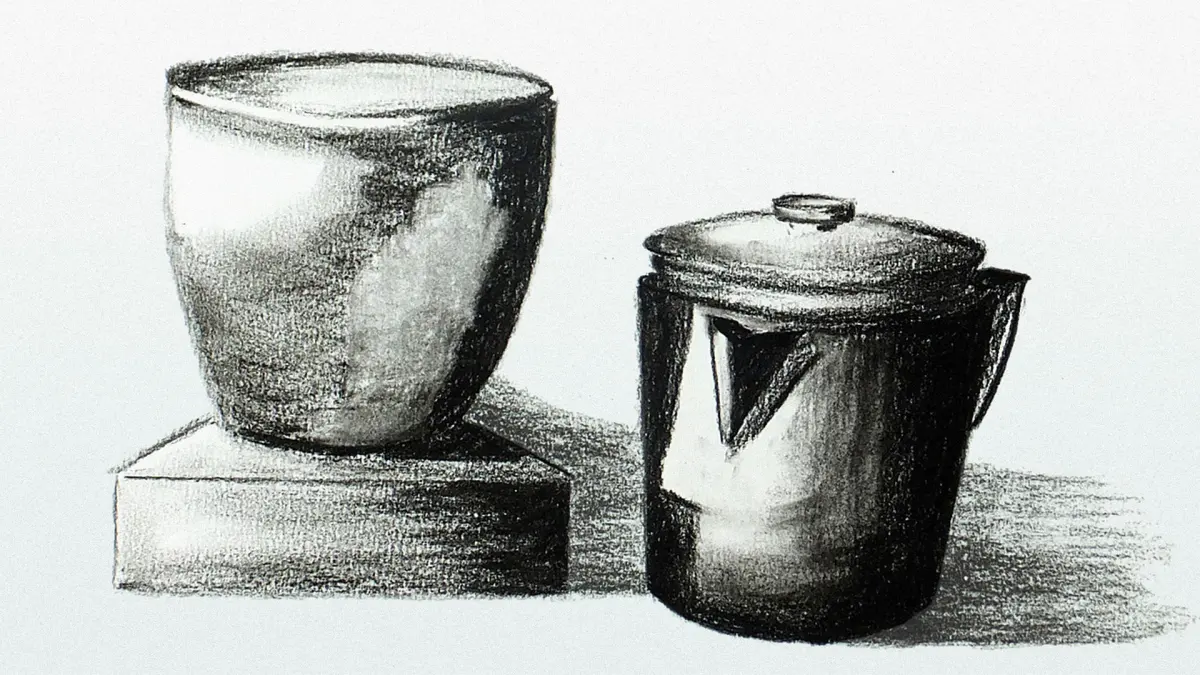
When drawing, you must adjust your values to reflect this loss of light. If you are using graphite, apply a lighter touch for the reflection or use a harder pencil grade, such as an H or 2H, to keep the tones subtle. If painting, mix a small amount of the surface color into your reflection pigments to harmonize the colors. Remember that the reflection is essentially a projection of the bottom of the object, meaning you will often see parts of the subject that are hidden from a direct front-facing view.
Common mistakes when drawing reflections
One of the most frequent errors artists make is failing to align the reflection directly beneath the object. The reflection should always follow the vertical axis of the subject, regardless of the viewer's position. If the object is tilted, the reflection must be tilted at an equal and opposite angle to maintain geometric accuracy. Another common mistake is making the reflection too detailed, which can clutter the composition and distract from the subject.
Avoid these pitfalls by checking your alignment before finalizing your work. If your reflection looks "off," it is likely because the vertical lines are not perfectly perpendicular to the horizon. Keep your reflection simplified; focus on the major shapes and values rather than small, intricate details. By keeping the reflection secondary to the actual object, you create a more natural focal point that guides the viewer's eye across the page without overwhelming the scene.
Best tools for drawing reflections
The choice of medium significantly affects how you render reflections. For beginners, graphite pencils are ideal because they allow for easy blending and value adjustments. A kneaded eraser is an essential tool, as it can lift graphite to create the bright, shimmering highlights often found on reflective surfaces. If you prefer color, soft pastels or watercolors provide the fluidity needed to mimic the soft, shifting nature of reflections on water or wet pavement.
When working with ink or markers, you must rely on negative space and clean lines to suggest the reflective quality. Because these mediums are less forgiving, plan your highlights before you begin inking. Consider using the following tools to enhance your technique:
- A blending stump or tortillon to soften the edges of the reflection.
- A white gel pen or opaque white paint for adding sharp, crisp highlights on water.
- A ruler or straightedge to ensure the vertical alignment of the reflection remains accurate.
- A variety of pencil grades to distinguish between the deep, dark tones of the reflection and the lighter surface ripples.
How to draw reflections on wet surfaces
Reflections on wet ground, such as asphalt or stone, behave differently than those on deep water. These surfaces are often uneven, meaning the reflection will be broken and fragmented by the texture of the ground. Focus on the highlights and shadows of the environment, as these are what typically reflect onto the wet surface. Instead of drawing a perfect mirror image, focus on the patches of color and light that appear in the puddles or wet areas.
To master this effect, observe how light pools in the low points of the ground. The reflection should follow the contours of the surface, meaning it will warp and bend as it travels over bumps or cracks. Keep the edges of these reflections soft and fuzzy to suggest the dampness of the ground. By emphasizing the contrast between the wet, reflective areas and the dry, matte surroundings, you create a convincing sense of depth and atmosphere that grounds your drawing in a realistic, tangible environment.
Key facts
- Reflections are always symmetrical to the object, appearing directly opposite the surface plane.
- Light travels in straight lines, meaning the angle of incidence equals the angle of reflection.
- Water surfaces create distorted, wavy reflections because the surface is rarely perfectly flat.
- Mirror reflections are laterally inverted, meaning left and right are swapped but top and bottom remain the same.
- Darker values in a reflection are often slightly lighter than the object itself due to light scattering.
- Use a ruler to map the vertical distance from the object to the surface to ensure the reflection is accurate.
The bottom line
Drawing accurate reflections requires a disciplined focus on vertical alignment and light physics. By treating the reflective surface as a mirror plane, you can map the object’s dimensions precisely. Remember that reflections are usually softer and lighter than the original subject. With careful observation of how light interacts with different surfaces, you can create convincing, realistic depth that anchors your drawings firmly in their environment.
People also ask
Why do reflections look distorted on water?
Water surfaces are dynamic and often contain ripples that break up the reflected light. These waves act like tiny, curved mirrors, scattering the image and causing the characteristic "wavy" appearance seen in nature.
How do you draw a reflection on a shiny floor?
Start by drawing the object, then project vertical lines downward from the base to establish the reflection's starting point. Keep the reflection slightly less detailed and lighter in value than the object to suggest the surface's finish.
What is the biggest mistake when drawing reflections?
The most common error is failing to maintain the correct vertical alignment between the object and its reflection. If the reflection is shifted horizontally, the image will look disconnected and unrealistic to the viewer.
Do reflections always have the same colors as the original object?
Reflections often appear slightly cooler or desaturated compared to the object. This happens because the surface of the water or glass absorbs some light and reflects the ambient color of the sky or surroundings.
Should I use a blending tool for reflections?
Using a blending stump or soft cloth helps create the smooth transition needed for reflective surfaces. However, avoid over-blending, as you still need to maintain the defined shapes and edges of the reflected object.
How does perspective affect a reflection?
As an object moves further away from the reflective surface, its reflection also appears to recede and diminish in size. You must apply standard linear perspective rules to the reflection just as you would to the object itself.
This answer was created with the help of AI research tools and reference sources. Spotted an error? Let us know — we correct mistakes quickly. See our editorial policy.