How do you draw a human body?
Short answer
Drawing the human body requires understanding underlying skeletal structures and proportional relationships. By using the "head-height" measurement system, artists establish accurate scale before adding muscle and skin. Success relies on breaking complex forms into simple geometric shapes, such as spheres and cylinders, to define volume, depth, and anatomical movement effectively.
On this page
How to use proportions for figure drawing
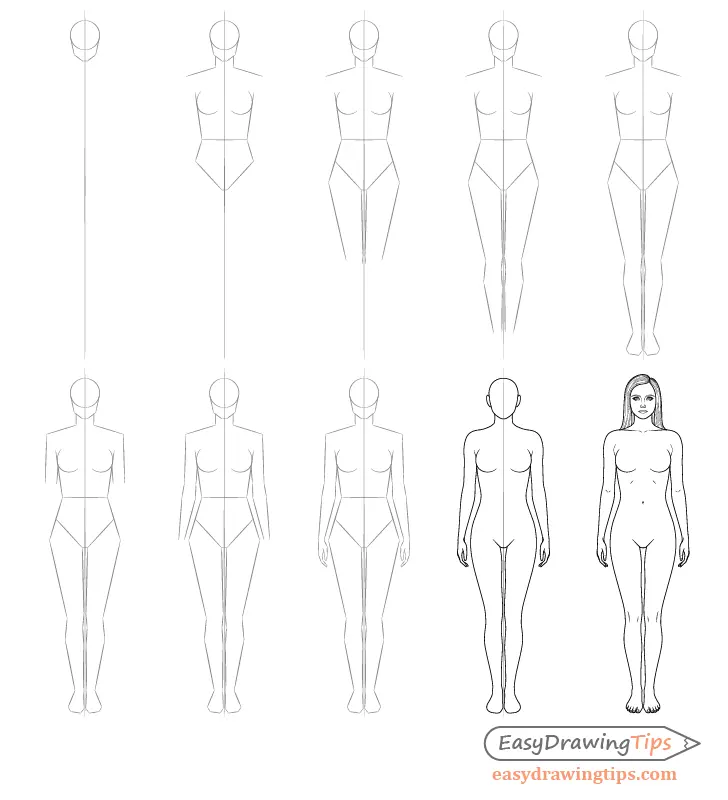
The standard unit of measurement in classical art is the "head," where the total height of an adult figure typically measures seven to eight heads tall. To begin, draw a vertical line and divide it into eight equal segments. The first segment represents the head, while the second segment ends at the chest line. The fourth segment marks the pubic bone, which serves as the midpoint of the entire body.
When mapping out these proportions, keep the following benchmarks in mind:
- The shoulders are generally two heads wide.
- The elbows align with the waist, typically at the third head mark.
- The fingertips reach down to the mid-thigh area, near the fifth head mark.
- The knees are positioned at the sixth head mark.
By establishing these landmarks first, you prevent the common error of making the limbs too short or the torso disproportionate. Always sketch these guidelines lightly so they can be erased or integrated into the final shading process.
Best shapes for drawing the human body
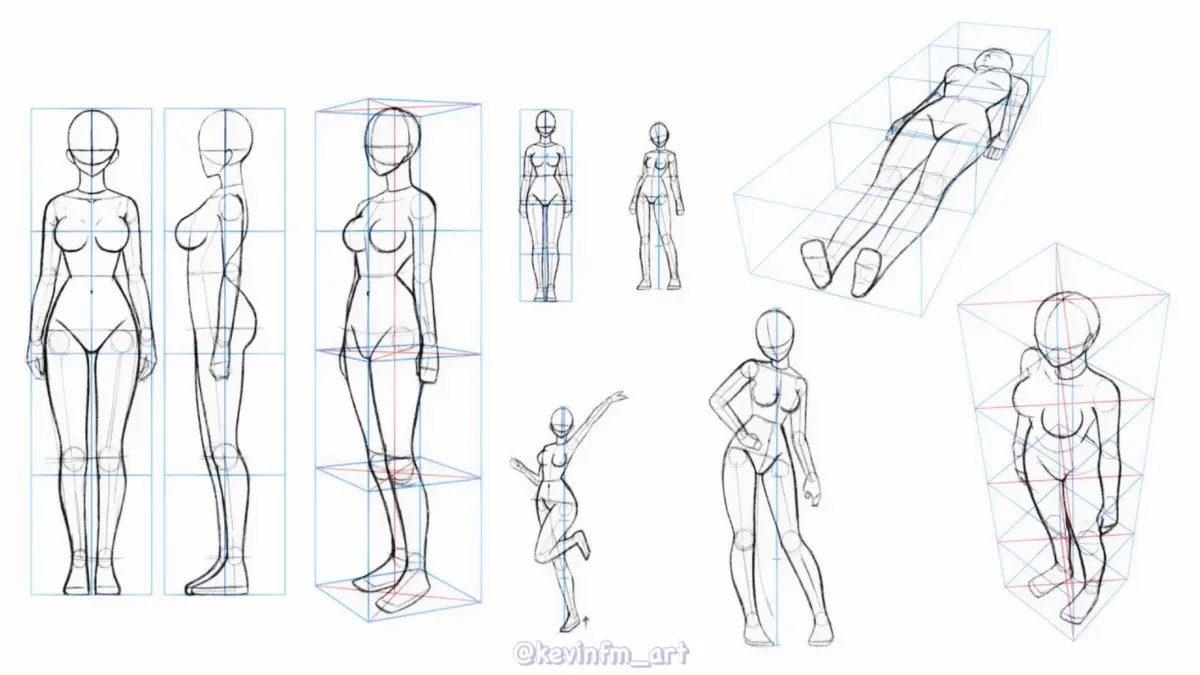
The human body is composed of complex curves, but it is best understood as a collection of simple geometric primitives. Think of the rib cage as an oval or egg shape, the pelvis as a rectangular box, and the limbs as interconnected cylinders. By reducing the body to these basic forms, you can easily manipulate the figure in three-dimensional space without getting lost in intricate anatomical details.
- Start by drawing a small oval for the head.
- Connect the head to the rib cage using a simple line for the spine.
- Draw a box for the pelvis, tilting it to suggest movement.
- Use cylinders for the upper and lower arms and legs, placing spheres at the joints to represent shoulders, elbows, and knees.
This "mannequin" approach allows you to visualize how the body occupies space. Once the underlying volume is established, you can refine the contours to reflect the actual organic shape of muscles and skin.
Why anatomy matters for realistic drawings
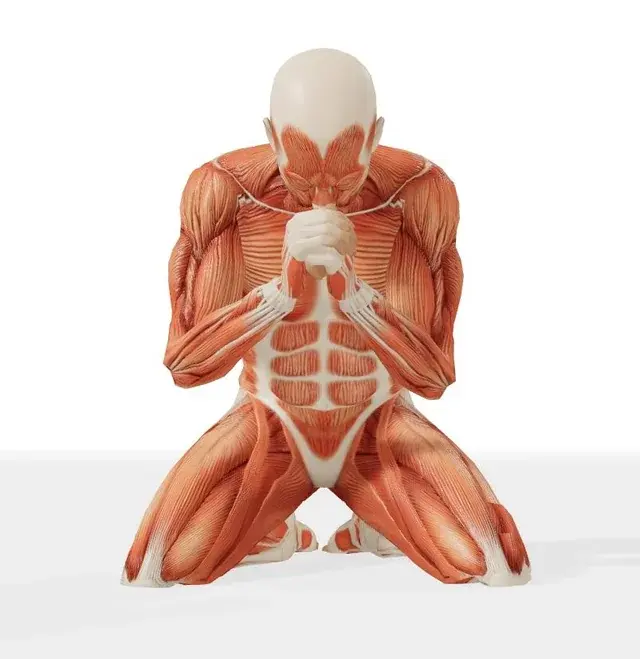
Understanding skeletal structure is essential because bones dictate the range of motion and the visible landmarks of the body. While you do not need to memorize every bone, knowing the location of the clavicle, the scapula, and the iliac crest helps you draw realistic poses. These bony landmarks remain visible even under layers of muscle, providing the necessary structure for a convincing human form.
Muscles act as the padding over this frame, changing shape as they contract or stretch. For instance, when an arm is bent, the bicep shortens and thickens, while the tricep stretches. Studying the origin and insertion points of major muscle groups prevents "noodle-like" limbs. By observing how muscles bunch up or flatten during movement, you add weight and credibility to your work. A figure that lacks an understanding of these internal mechanics often appears flat, rubbery, or structurally impossible.
Common mistakes when drawing the human body
A frequent error for beginners is focusing on surface details, such as facial features or fingers, before the overall gesture is correct. This leads to "tunnel vision," where the drawing becomes lopsided or loses its sense of balance. Always prioritize the "line of action," an imaginary line that follows the curve of the spine, to capture the flow and energy of the pose before adding weight or volume.
Another common mistake involves ignoring the perspective of joints. Beginners often draw limbs as flat shapes rather than cylindrical forms wrapping around a core. To fix this, use contour lines—curved lines that wrap around your cylinders—to indicate that the limb is a round, solid object. Finally, avoid drawing limbs that are perfectly straight; the human body is defined by subtle bends and shifts in weight. Even when standing still, the body rarely forms a perfectly straight vertical line, as the hips and shoulders usually tilt in opposition to maintain balance.
How to practice drawing figures daily
Consistent practice is the most effective way to improve your figure drawing skills. Dedicate time to "gesture drawing," which involves sketching a pose in 30 to 60 seconds. The goal is not perfection, but rather capturing the essence, movement, and weight of the figure. Use reference photos or observe people in public spaces to build your visual library of how different body types move and rest in various environments.
- Set a timer for short intervals to force quick decision-making.
- Alternate between long, detailed studies and rapid, loose sketches.
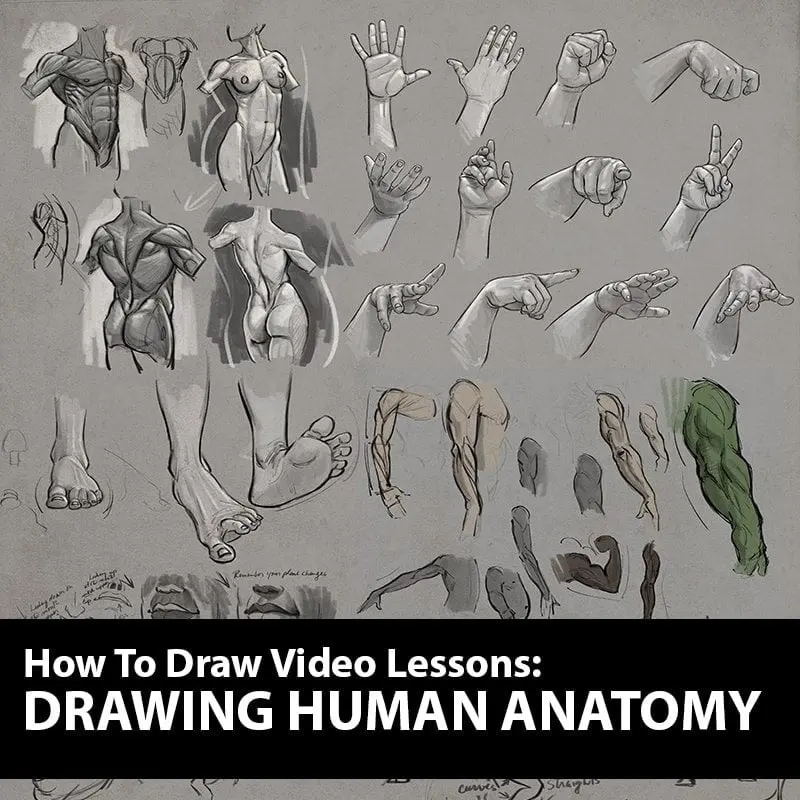
- Focus on one body part at a time, such as hands or feet, during dedicated sessions.
- Review your work periodically to identify recurring errors in proportion or perspective.
As you gain confidence, challenge yourself with more dynamic poses, such as running, jumping, or sitting in complex chairs. By consistently applying these principles of proportion, geometry, and anatomy, you will develop the ability to render the human body with increasing accuracy and artistic expression over time.
Key facts
- The average adult human height is measured as approximately 7.5 to 8 heads tall.
- The midpoint of the human body is located at the pubic bone, not the navel.
- Elbows typically align with the bottom of the ribcage, while wrists align with the crotch.
- Use a "mannequin" approach by breaking the body into simple geometric shapes like cylinders, spheres, and cubes.
- Keep the spine's line of action in mind to ensure the figure appears balanced and natural rather than stiff.
- Avoid drawing individual muscles early on; focus on the overall gesture and proportions first to maintain structural integrity.
The bottom line
Drawing the human body effectively relies on mastering proportions, starting with the standard eight-head height ratio. By simplifying complex anatomy into geometric volumes and focusing on the gesture or line of action, you create a solid foundation. Consistent practice using anatomical references and life drawing will refine your ability to depict weight, balance, and movement, ultimately transforming simple shapes into a convincing, expressive human figure.
People also ask
How do I improve my understanding of human anatomy?
Study skeletal and muscular diagrams to understand the underlying structures that dictate surface forms. Practicing life drawing sessions or using anatomical reference books helps bridge the gap between abstract shapes and realistic detail.
What is the best way to practice drawing hands and feet?
Break them down into simple blocks or mittens to establish the correct volume and orientation before adding fingers or toes. Focus on the connection points to the wrist and ankle to ensure they look like natural extensions of the limbs.
Why do my drawings look flat?
A lack of perspective and shading often causes figures to appear two-dimensional. Incorporate light source mapping to create shadows that define form and use overlapping shapes to suggest depth.
Should I use a reference image?
Using references is essential for accuracy, especially when learning the nuances of foreshortening and complex poses. Even professional artists rely on photos or models to capture the subtle shifts in weight and balance.
How do I draw movement in a figure?
Focus on the "gesture," which is a quick, fluid sketch capturing the primary line of action through the spine. Avoid rigid outlines and prioritize the flow of the pose to convey energy and motion.
What is the most common mistake for beginners?
Beginners often draw the head too large or limbs too short, which disrupts the body's natural proportions. Measuring your sketch against the "eight-head rule" frequently helps identify and correct these scaling errors early in the process.
This answer was created with the help of AI research tools and reference sources. Spotted an error? Let us know — we correct mistakes quickly. See our editorial policy.