How do you draw a fern?
Short answer
Drawing a fern requires capturing its rhythmic, repetitive structure. Start by sketching a central stem, then add symmetrical, tapering leaflets called pinnae along the length. Focus on the alternating pattern of these segments, gradually decreasing their size toward the tip to create the iconic, elegant silhouette characteristic of the Pteridophyta division.
On this page
How to structure a fern drawing
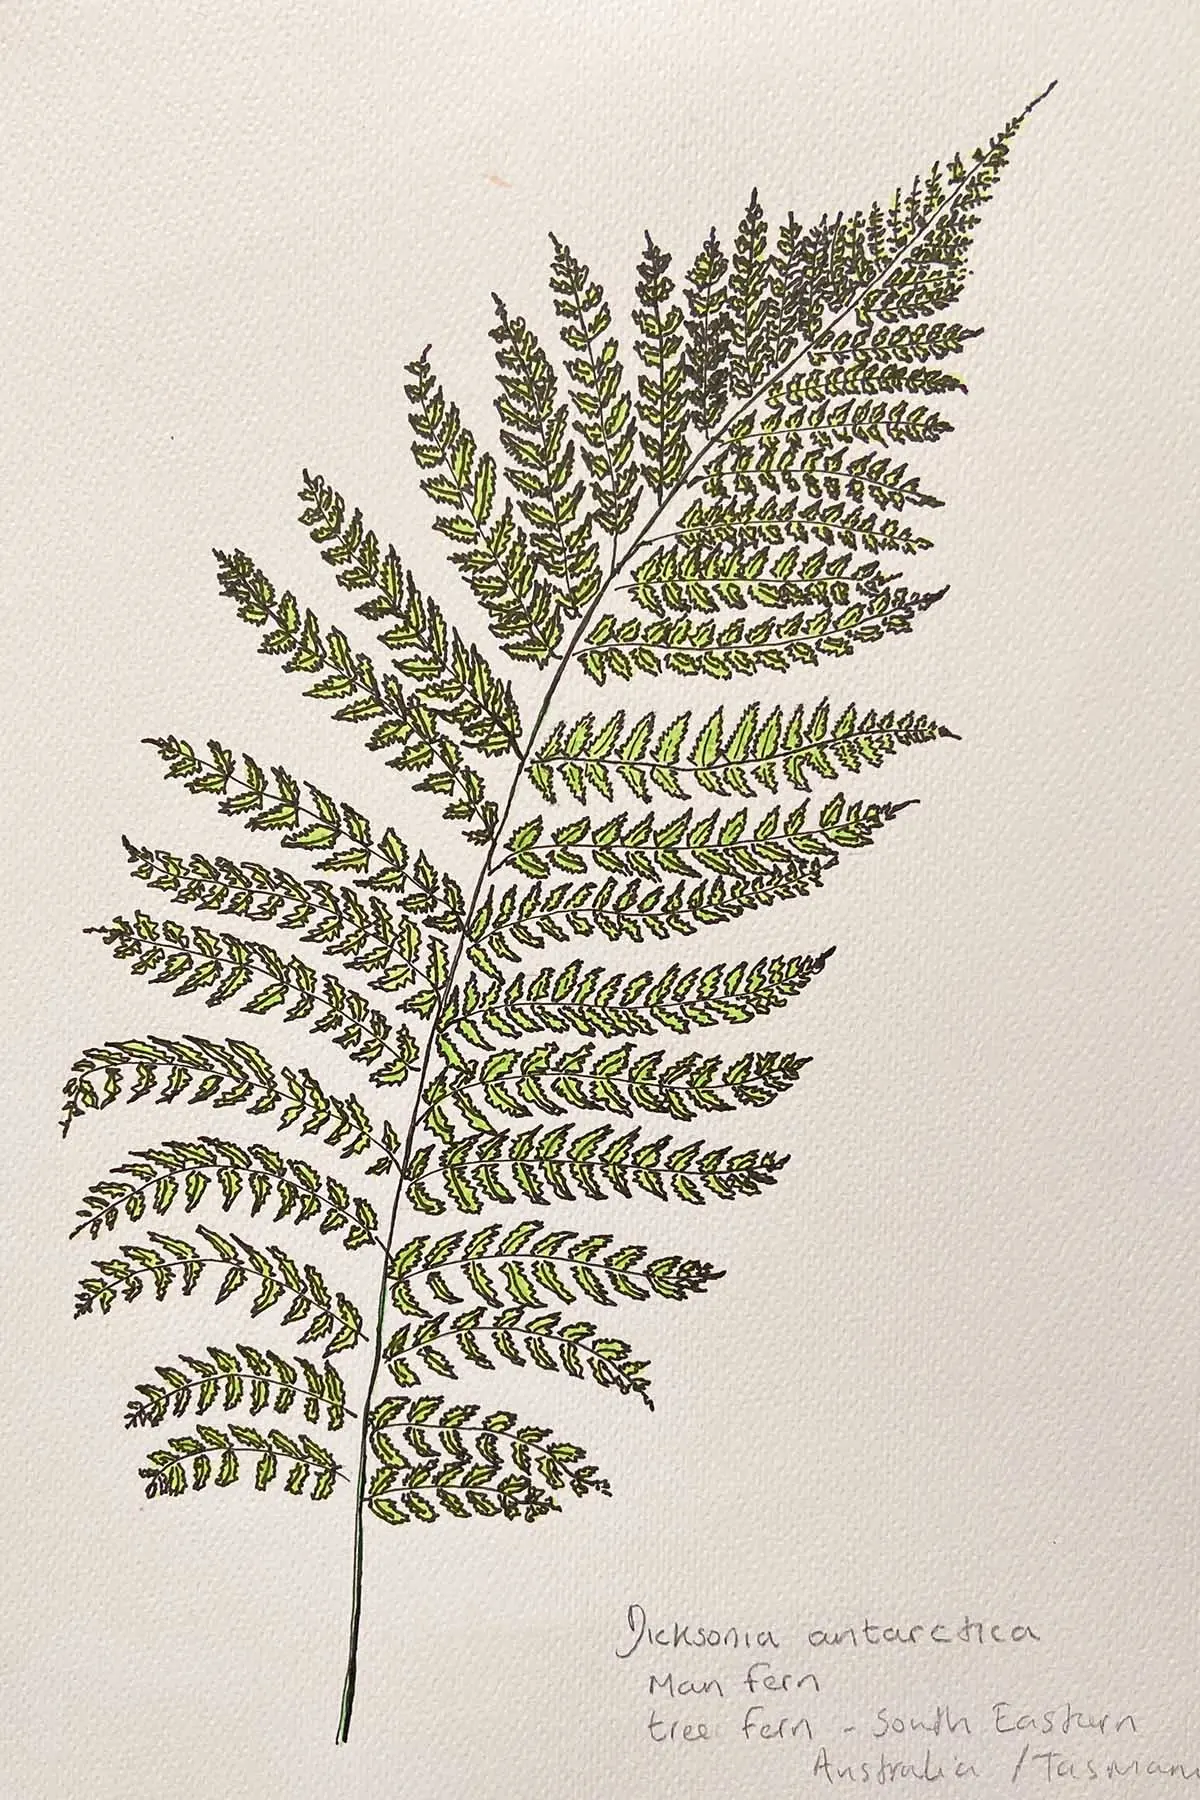
The secret to a convincing fern lies in its mathematical precision. Most ferns follow a pinnate structure, meaning they consist of a central stalk, or rachis, with smaller leaflets branching off in pairs. Before adding detail, draw a light, curved line to represent the rachis. This curve dictates the "flow" of the plant, preventing the drawing from appearing stiff or artificial.
Once the rachis is established, mark small ticks along it to indicate where the pinnae will attach. Keep these marks closer together near the top and wider apart toward the base. This simple guide ensures your proportions remain accurate throughout the process. Remember that ferns are organic, so while symmetry is key, slight variations in the angle of the leaflets will make the drawing look more natural.
Best drawing techniques for beginners
Beginners often struggle with the complexity of fern foliage, but breaking the plant down into basic shapes simplifies the task. Instead of drawing every jagged edge immediately, sketch the overall outline of each leaflet as a simple oval or elongated triangle. Once the framework is set, you can refine the edges to show the specific serration or lobing typical of the species.
- Draw a long, graceful curve for the main stem.
- Add small, evenly spaced marks along the stem to guide leaflet placement.
- Sketch light, wedge-shaped blocks to define the size and angle of the leaflets.
- Refine the edges of these blocks to create the characteristic serrated look.
- Add a second, smaller layer of detail by drawing the veins radiating from the center of each leaflet.
Why fern symmetry matters
Ferns are recognized by their fractal-like repetition, where the entire plant mimics the shape of its individual parts. If the leaflets are inconsistent in size or spacing, the drawing will lose its botanical identity. To achieve balance, always work from the bottom of the stem toward the tip. This allows you to adjust the scale of the leaflets as the plant naturally tapers.
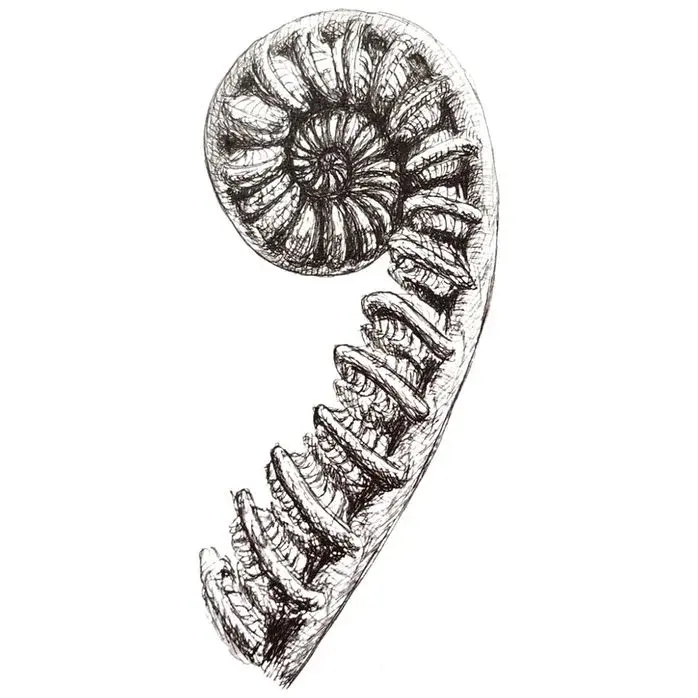
If you find your drawing looks lopsided, check the angle of your leaflets relative to the rachis. In most species, such as the common sword fern, the leaflets meet the stem at a consistent angle. Maintaining this angle throughout the length of the rachis provides the visual rhythm that defines the fern. If you are drawing a fiddlehead, or young fern, focus on a tight spiral shape that gradually unfurls into the pinnate structure.
Common mistakes when drawing ferns
The most frequent error is drawing leaflets that are too uniform or perfectly rigid. Real ferns have a slight droop or curve due to gravity, so avoid making every leaflet perfectly horizontal. Another mistake is overcrowding the stem; if the leaflets overlap too much, the drawing becomes a cluttered mess rather than a clear botanical study. Always leave small gaps between the leaflets to allow the viewer to see the underlying structure.
- Avoid making the leaflets perfectly flat; give them a slight curve to suggest volume.
- Do not draw the central stem as a single, thick line; give it thickness to show it is a physical stalk.
- Avoid using heavy, dark outlines for every single leaflet, which can make the plant look like a cartoon.
- Ensure the leaflets at the very tip of the fern are significantly smaller than those at the base.
How to add realistic texture and detail
Detailing is the final step that transforms a simple sketch into a professional illustration. Focus on the venation, which consists of a central vein running through each leaflet with smaller veins branching out toward the edges. Use a sharp, light pencil to create these delicate lines, as heavy pressure will detract from the plant's natural grace. You can also add subtle shading on the underside of the leaflets to create depth and shadow.
Consider the environment of the fern when adding final touches. If the plant is meant to be in a forest setting, you might add a few spores on the underside of the leaflets, known as sori, which appear as small, brownish dots. These small, accurate details provide a sense of scientific realism. By focusing on the interplay between the light and the intricate, repetitive geometry of the leaves, you will capture the essence of this ancient plant.
Key facts
- Ferns are characterized by fronds, which are complex leaves that grow from a central rhizome.
- The primary structure of a fern is a central stalk called the rachis, from which smaller leaflets called pinnae emerge.
- When drawing, always start with a light, curved line to establish the "spine" or rachis of the frond.
- Pinnae are typically arranged in a symmetrical, alternating pattern along the rachis, becoming smaller toward the tip.
- To create a realistic texture, use short, quick pencil strokes to indicate the serrated or jagged edges of the leaflets.
- A common mistake is drawing the pinnae too uniformly; vary their size and angle slightly to mimic natural organic growth.
The bottom line
Drawing a fern requires observing the rhythmic, repeating patterns of its fronds. By establishing a graceful, curved rachis first, you provide a sturdy foundation for the leaflets. Focus on the alternating placement and tapering size of the pinnae to achieve a lifelike appearance. With practice, you will master the organic flow of these ancient plants, turning simple lines into a detailed, elegant botanical study.
People also ask
How do I make my fern drawing look more three-dimensional?
Add subtle shading along the underside of the rachis and at the base of each leaflet. This creates depth and suggests the way fronds naturally curve and fold in space.
Should I draw the spores on the back of the leaves?
You can add small, circular clusters called sori on the underside of the pinnae for scientific accuracy. These are typically arranged in rows or patterns depending on the specific species of fern.
What is the best pencil grade for sketching ferns?
Use an HB pencil for the initial light outline and a 2B or 4B pencil for adding darker shadows. Softer leads allow for richer contrast, which helps the intricate leaflets stand out.
Why does my fern drawing look like a ladder?
This happens when you draw the pinnae at perfectly horizontal, rigid angles. To fix this, angle the leaflets upward toward the tip of the frond to reflect how they grow in nature.
How do I draw a fiddlehead fern?
Start by drawing a tight spiral at the top of a thick, fuzzy stalk. Use small, overlapping curved lines to suggest the tightly coiled, immature frond before it unfurls.
Can I use ink for fern illustrations?
Ink is excellent for botanical illustration because it captures fine detail and high contrast. Use a fine-liner pen to emphasize the veins and serrated edges after completing your pencil sketch.
This answer was created with the help of AI research tools and reference sources. Spotted an error? Let us know — we correct mistakes quickly. See our editorial policy.