Can you use acrylic paint on wood?
Short answer
Yes, acrylic paint is an excellent choice for wood surfaces. It adheres well, dries quickly, and offers a durable, flexible finish once cured. Because wood is porous, proper preparation—such as sanding and priming—is essential to ensure the paint remains smooth, vibrant, and resistant to peeling over many years of use.
On this page
How to prepare wood for acrylic paint
Proper surface preparation is the most critical step in achieving a professional finish. Raw wood is highly absorbent, meaning it will soak up moisture from the paint, which can cause the wood grain to swell or the paint to appear uneven. Start by sanding the surface with medium-grit sandpaper, typically around 120-grit, to remove splinters and create a uniform texture. Follow this with a finer 220-grit paper to smooth out any remaining roughness.
Once sanded, remove all dust using a tack cloth or a slightly damp microfiber towel. If you skip this, the paint will adhere to the dust rather than the wood, leading to premature flaking. For the best results, apply a coat of acrylic-based primer. This creates a non-porous barrier that prevents the wood from "drinking" the paint and ensures that your colors remain true to their original hue.
Why use primer before painting wood
Priming serves as a vital bridge between the raw wood and your decorative paint layers. Without a primer, wood tannins—the natural oils found in species like cedar, oak, or pine—can bleed through the paint, causing unsightly yellow or brown stains. A high-quality acrylic primer seals these tannins inside the wood fibers, keeping your white or light-colored paint jobs pristine.
Furthermore, primer improves the mechanical bond between the paint and the substrate. It provides a consistent surface tension that allows the acrylic paint to spread evenly without streaking. If you are painting over a previously finished or varnished piece of wood, primer is even more necessary to ensure the new layer of paint can "grip" the slick surface. Skipping this step often results in a finish that scratches off easily with minimal physical contact.
- Clean the wood surface thoroughly to remove grease, wax, or debris.
- Sand the surface to remove old finishes or rough patches.
- Wipe away all sanding dust to ensure a clean base.
- Apply one or two coats of a high-quality acrylic primer.
- Allow the primer to dry completely according to the manufacturer's instructions.

Best acrylic paint types for wood projects
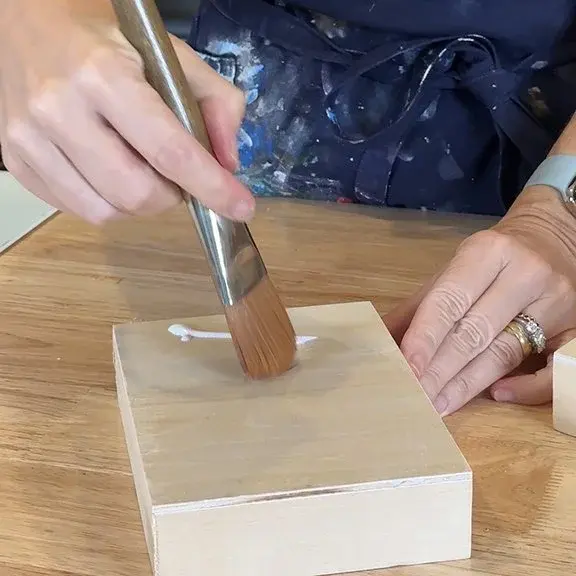
Not all acrylic paints are formulated the same, and choosing the right variety depends on your specific project. For small crafts or decorative items, standard craft-grade acrylics in tubes or bottles are sufficient. These are affordable and come in a vast array of colors. However, for furniture or pieces that will see frequent handling, heavy-body acrylics or acrylic enamels are superior. These contain higher pigment loads and stronger binders, which provide a thicker, more durable coating.
When selecting paint, consider the finish you desire. Acrylics are available in matte, satin, semi-gloss, and high-gloss varieties. Matte finishes are excellent for hiding minor imperfections in the wood, while glossier finishes offer better resistance to moisture and are easier to wipe clean. Always check the label to ensure the paint is compatible with wood surfaces, as some specialized acrylics are designed exclusively for canvas or paper.
- Heavy-body acrylics: Best for textured effects and durability.
- Acrylic enamels: Ideal for furniture due to their hard, scratch-resistant finish.
- Craft acrylics: Perfect for indoor decor and small art projects.
- Fluid acrylics: Best for thin, smooth washes or decorative staining effects.
Common mistakes when painting wood
One of the most frequent errors is applying paint that is too thick. While it is tempting to try and cover the wood in one heavy coat, this often leads to drips, uneven drying, and a gummy texture that never fully hardens. Instead, apply several thin, light coats, allowing each layer to dry thoroughly before adding the next. This method creates a much stronger, more professional-looking finish that is less prone to cracking.
Another common mistake is failing to account for the drying time required for the wood to acclimate. If you paint wood that is damp or has been stored in a humid environment, the paint may trap moisture inside, leading to bubbling or peeling later. Additionally, many beginners forget to seal the finished product. Even though acrylic paint is water-resistant once dry, a clear topcoat—such as a water-based polyurethane—provides an extra layer of protection against scratches, UV light, and spills.
How long does it take to cure
While acrylic paint may feel dry to the touch within 30 to 60 minutes, "dry" is not the same as "cured." Curing refers to the chemical process where the paint binders fully harden and reach their maximum durability. For most acrylic paints on wood, this process takes between 24 to 72 hours, depending on the temperature and humidity levels in your workspace. During this window, the paint remains slightly soft and susceptible to dings or impressions.
To ensure a long-lasting result, avoid placing heavy objects on your painted wood or subjecting it to heavy use until the full curing time has passed. If you are working in a cool or damp environment, expect the drying and curing times to extend significantly. Proper ventilation is also crucial during this period, as it helps the water content in the paint evaporate efficiently. Patience during this final stage is the difference between a project that lasts for years and one that requires frequent touch-ups.
Key facts
- Acrylic paint adheres exceptionally well to wood because it is a water-based polymer that penetrates porous surfaces.
- Always sand raw wood with 120-to-220-grit sandpaper before painting to ensure a smooth, uniform surface for the pigment.
- Applying a coat of primer or gesso prevents the wood from absorbing too much moisture, which can cause the grain to swell.
- Thinning acrylic paint with a small amount of water allows for better flow and reduces visible brush strokes on the wood.
- Seal the finished project with a clear acrylic varnish or polyurethane spray to protect the paint from fading, moisture, and scratches.
- Avoid using acrylics on damp or treated lumber, as the paint will fail to bond and may peel off as the wood dries.
The bottom line
Acrylic paint is an excellent choice for wood projects due to its versatility, fast drying time, and durability. By properly preparing the surface through sanding and priming, you create a stable foundation that prevents peeling. Whether you are crafting small decorations or painting furniture, finishing your work with a protective sealer ensures that your vibrant colors remain preserved against environmental wear and tear for years.
People also ask
Do I need to seal the wood after painting?
Yes, sealing is essential for durability. A clear topcoat protects the paint from dust, UV light, and humidity, ensuring your artwork lasts for years.
Can I use acrylic paint on outdoor wooden furniture?
You can, but you must use high-quality exterior-grade acrylic paint and a weather-resistant sealer. Without proper sealing, outdoor elements will cause the paint to crack and chip rapidly.
Why is my paint peeling off the wood surface?
Peeling usually occurs because the wood was dirty, oily, or not sanded properly before application. Ensure the surface is clean and dry before you begin painting.
Is it better to use a brush or a roller for wood projects?
Use a synthetic-bristle brush for detailed work and tight corners. A small foam roller is best for covering large, flat surfaces quickly with a smooth finish.
Can I mix acrylic paint with wood stain?
It is generally not recommended to mix them directly, as they have different chemical bases. Instead, apply a wood stain first, let it dry completely, and then paint your acrylic design on top.
How long does acrylic paint take to dry on wood?
Acrylics typically dry to the touch within 20 to 30 minutes. However, you should wait at least 24 hours before applying a protective varnish to ensure the paint has fully cured.
This answer was created with the help of AI research tools and reference sources. Spotted an error? Let us know — we correct mistakes quickly. See our editorial policy.