How do you draw a lizard?
Short answer
Drawing a lizard requires breaking its complex form into simple geometric shapes like ovals and cylinders. Start by sketching the head, torso, and tail as connected masses, then refine the limbs and skin texture. Focusing on the creature’s unique spinal curve and limb articulation ensures a realistic, dynamic final illustration.
On this page
How to structure a lizard drawing
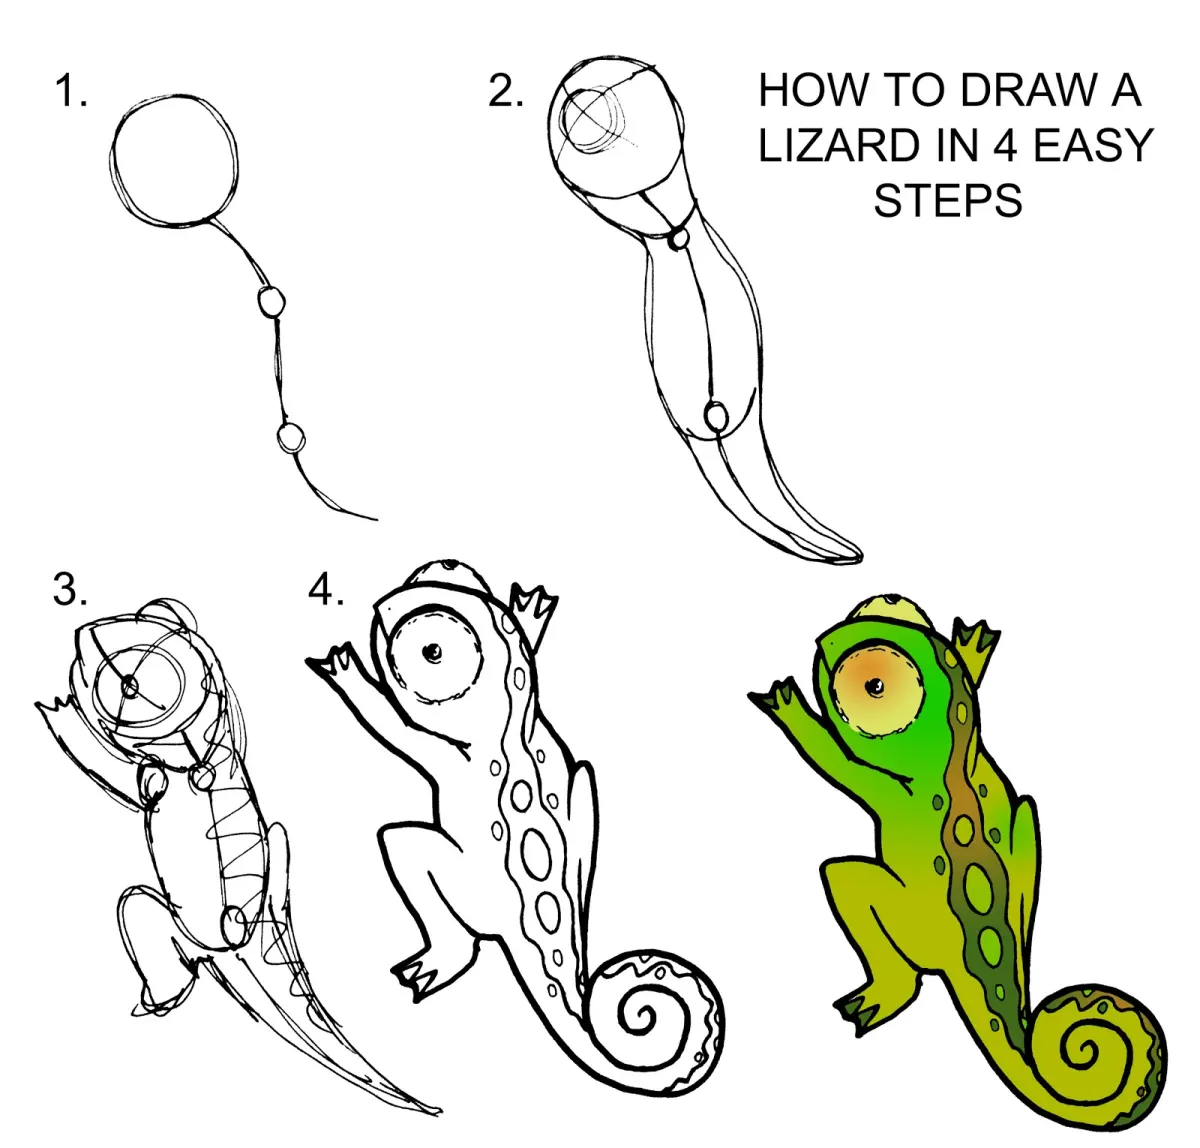
To begin, visualize the lizard as a series of three primary volumes: the head, the chest cavity, and the pelvic region. Use light pencil strokes to draw an elongated oval for the head, a larger oval for the torso, and a smaller, rounded shape for the hips. Connect these shapes with a flowing line that represents the spine, which often curves gracefully from the neck to the tip of the tail.
Establishing these proportions early is vital for anatomical accuracy. Most lizards possess a tail that is equal to or longer than their body length, so do not cut it short. Once the basic framework is in place, you can add the limbs. Remember that lizard legs typically splay outward from the sides of the body rather than tucking directly underneath like a mammal’s.
- Sketch the skull as a wedge shape.
- Draw the main torso as a bean-like oval.
- Extend a long, tapering line for the tail.
- Place four small circles where the joints will be.
Best tools for drawing reptiles
For beginners, a standard HB graphite pencil is the best tool for creating the initial light construction lines. Because lizards feature intricate scales and folds, you should also have a 2B or 4B pencil on hand for adding depth and darker shadows later in the process. Using a kneaded eraser is highly recommended, as it allows you to lift graphite gently without damaging the texture of your drawing paper.
If you are working on fine details, a mechanical pencil with 0.5mm lead provides the precision needed for individual scale patterns. Avoid using heavy-handed pressure during the early stages, as indentations in the paper will make it difficult to shade smoothly. High-quality smooth-surface drawing paper works best for reptiles, as it allows the pencil to glide easily when you are rendering the subtle gradients of the skin.
- HB pencil for light layout lines.
- 2B or 4B pencil for shading.
- Kneaded eraser for highlighting.
- Smooth-surface paper for detail work.
How to draw lizard skin texture
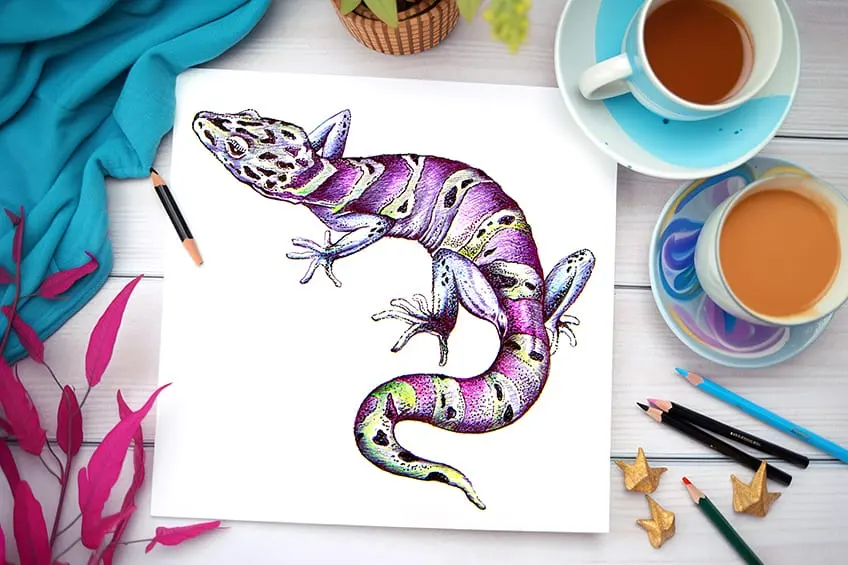
Lizard skin is defined by its variety of textures, ranging from smooth, granular bumps to large, overlapping plates. To capture this effectively, avoid drawing every single scale individually, as this often makes the drawing look cluttered or unnatural. Instead, focus on the areas where the skin stretches, such as around the joints and the neck, where the folds are more prominent and irregular.
Use a cross-hatching technique to build up shadows, letting the density of your lines suggest the thickness of the scales. In areas where the light hits the lizard’s back, keep your marks sparse to imply a reflective, leathery surface. If you are drawing a specific species like an iguana, incorporate small, jagged shapes along the spine to represent the crest. Always follow the contour of the body with your pencil strokes to maintain the three-dimensional form of the animal.
Common mistakes when drawing lizards
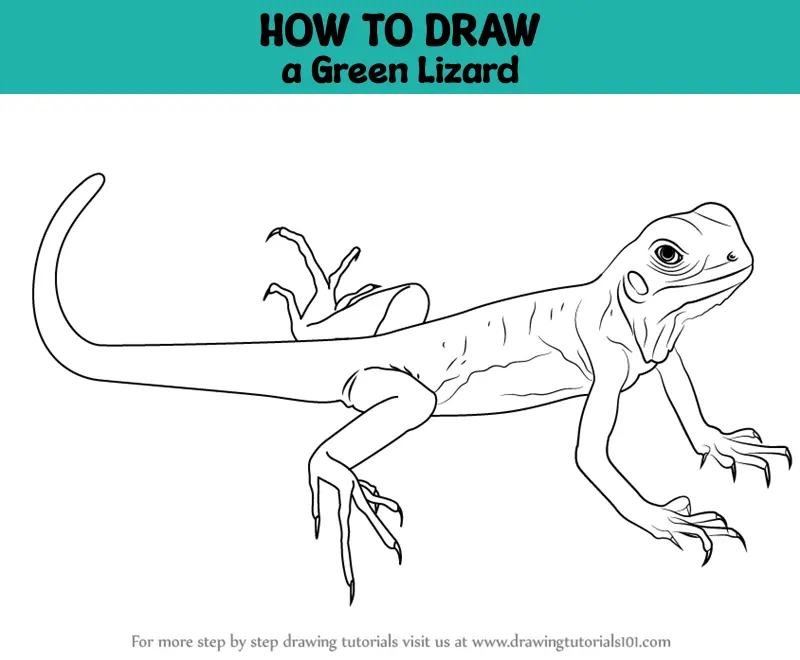
One of the most frequent errors is giving the lizard a mammalian posture. Unlike cats or dogs, lizards have a sprawling gait where the elbows and knees point outward, creating a distinct "zig-zag" shape in the limbs. If you draw the legs pointing straight down, the lizard will look stiff and anatomically incorrect. Always double-check the placement of the joints to ensure they reflect the reptile's natural, low-to-the-ground movement.
Another common mistake is neglecting the eyes and the mouth. Lizards have expressive, often lidless eyes that are set into the sides of the head, and their mouths often extend back toward the ear opening. Failing to account for this wide mouth line can make the head look like a generic tube. Pay attention to the specific shape of the snout, as it varies significantly between species like geckos, chameleons, and monitor lizards.
- Drawing limbs that point downward instead of outward.
- Making the tail too short relative to the body.
- Over-detailing every single scale on the body.
- Ignoring the curve of the spine.
Why lizard anatomy looks complex
The complexity of a lizard’s form stems from its need to balance agility with protection. Their bodies are built for lateral undulation, meaning they move by bending their bodies from side to side. When you draw a lizard, capturing this lateral curve is essential for making the animal look alive. If the spine is drawn as a perfectly straight line, the drawing will lack the energy and fluid motion characteristic of these reptiles.
Furthermore, the placement of the limbs is dictated by the lizard’s need to anchor itself to surfaces. Whether the lizard is climbing a tree or scurrying across desert sand, its toes are often splayed wide to distribute weight. By studying the way these creatures interact with their environment, you can better understand why their bodies are shaped the way they are. Practice observing live specimens or high-quality photographs to see how the skin bunches and stretches during movement, which will significantly improve your ability to render life-like reptiles.
Key facts
- Start by sketching a long, curved oval for the body and a smaller circle for the head to establish the lizard's core posture.
- Lizards possess a distinct "S" curve in their spine, so avoid drawing a perfectly straight line for the back.
- Draw the tail as a tapering extension of the spine that is often as long as or longer than the body.
- When sketching legs, place them on the sides of the body rather than underneath, as lizards have a sprawling, quadrupedal gait.
- Add texture to the skin by using small, overlapping triangles or irregular dots to suggest scales rather than drawing every individual scale.
- Focus on the eyes by placing them near the top of the head, as most lizards have high-set eyes for a wide field of vision.
The bottom line
Drawing a lizard requires balancing the creature's unique sprawling anatomy with subtle textural details. By beginning with simple geometric shapes to define the spine and limb placement, you create a solid foundation. Focus on the characteristic S-curve of the body and the tapering tail. Rather than over-detailing every scale, prioritize the lizard’s posture and eye placement to achieve a lifelike appearance that captures its natural, agile movement.
People also ask
How do I make a lizard look realistic?
Focus on the anatomy of the joints and the way the skin folds near the armpits and neck. Adding subtle shadows beneath the belly helps ground the creature on the surface.
Should I draw the lizard with five toes on each foot?
Most lizards have five digits on each foot, though some species like geckos or skinks may have variations. Check the specific species you are drawing to ensure accurate toe counts.
What is the best way to draw lizard scales?
Do not draw every single scale, as this makes the drawing look cluttered. Instead, draw a few detailed scales near the head and spine, then fade them out toward the edges.
How do I draw a lizard's tongue?
If drawing a monitor lizard or snake-like species, use a thin, forked line extending from the mouth. For other species, draw a thick, fleshy, and slightly rounded tongue.
Why do my lizard drawings look like crocodiles?
You are likely drawing the legs too far apart or the snout too blunt. Lizards typically have more slender bodies and more delicate, tapered snouts than crocodilians.
How do I add color to my lizard drawing?
Use base colors like olive green or brown, then layer brighter accent colors like yellow or orange. Lizards often have lighter bellies than their backs, so use a gradient for depth.
This answer was created with the help of AI research tools and reference sources. Spotted an error? Let us know — we correct mistakes quickly. See our editorial policy.