How can I draw a peony easily?
Short answer
Drawing a peony is best approached by simplifying its complex, ruffled layers into a series of concentric circles and organic, U-shaped petals. By starting with a loose, spherical guide and working from the center outward, you can capture the flower’s voluminous aesthetic without getting overwhelmed by the intricate, overlapping petal structure.
On this page
How to draw a peony step by step
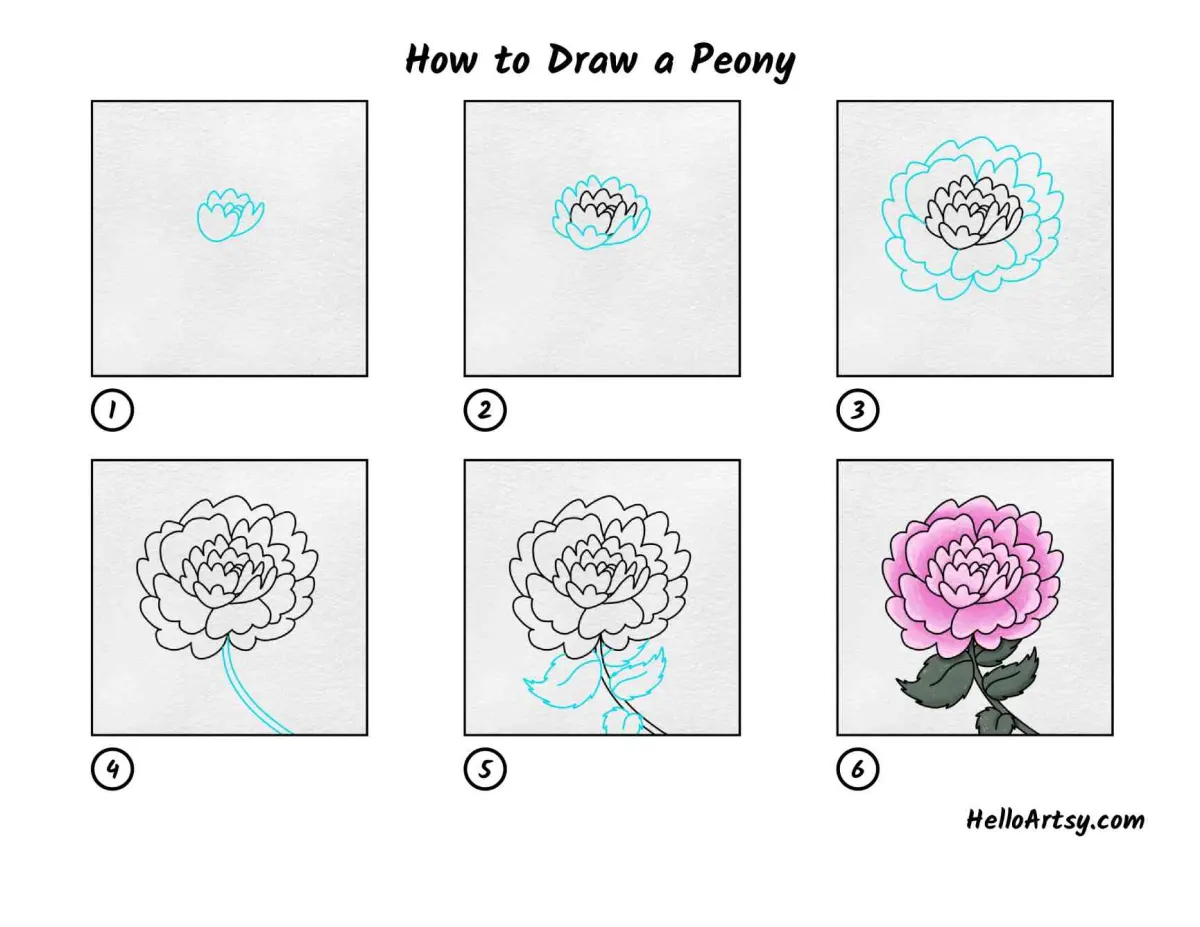
The most effective way to draw a peony is to break the flower down into basic geometric shapes before adding detail. Start by drawing a light, imperfect circle to represent the overall volume of the bloom. Within that circle, draw a smaller, tighter spiral or a cluster of small, overlapping U-shapes to serve as the center of the flower. This core provides a focal point that keeps the rest of your drawing organized.
Once the center is established, build the surrounding petals by drawing larger, wavy lines that radiate outward. Think of these as loose, ruffled layers that wrap around the central core. As you move toward the outer edges of the circle, make the petals progressively larger and more relaxed. Keep your lines soft and varied in curvature to mimic the natural, delicate texture of peony petals.
- Sketch a light circular guide for the head of the flower.
- Draw a small, dense cluster of U-shaped petals in the center.
- Add larger, overlapping petals around the center, moving outward.
- Vary the size and curve of each petal to create depth.
- Erase your initial guide lines and refine the edges with darker strokes.
Best drawing tools for beginners
For those new to botanical illustration, using a graphite pencil with a range of hardness is ideal. An HB pencil is perfect for the initial light sketching, as it can be easily erased without damaging the paper. Once the structure is set, a 2B or 4B pencil allows you to add darker values and depth to the shadows between the petals. Using a high-quality eraser, such as a kneaded eraser, is essential for lifting graphite gently without smearing your work.
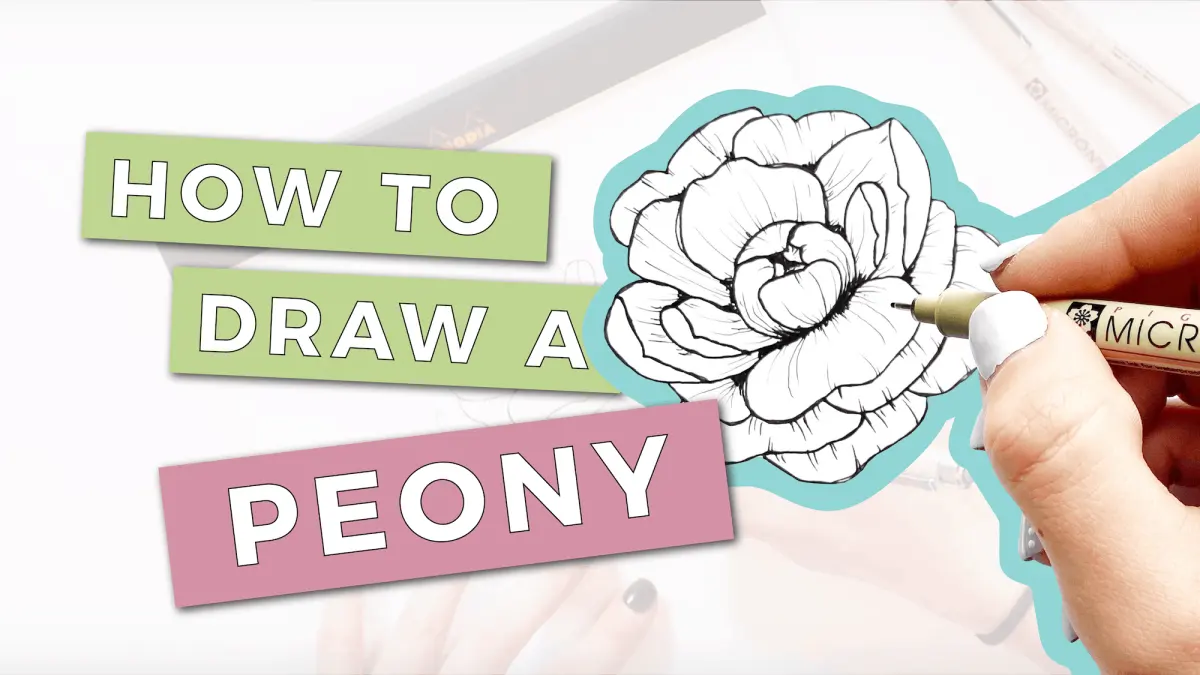
If you prefer working with ink, start with a fine-liner pen with a 0.3mm or 0.5mm tip. Ink is less forgiving than pencil, so it is helpful to keep your preliminary pencil sketch very faint. When using ink, focus on "hatching" or "cross-hatching" to create shadows rather than pressing harder with the pen. This technique adds a professional, illustrative quality to your peony that highlights the transition between the inner and outer petals.
- HB pencil for light structural guidelines.
- 2B or 4B pencil for adding contrast and shading.
- Kneaded eraser for lifting graphite and cleaning up lines.
- Smooth-finish paper to prevent the pencil from catching or smudging.
- Fine-liner pens for permanent, clean outlines if desired.
How to add depth and shading
Shading is what transforms a flat drawing into a three-dimensional representation of a peony. Because peonies have many overlapping petals, you must identify where one petal casts a shadow onto another. Focus your darkest shadows near the center of the flower, where the petals are most tightly packed and light cannot easily penetrate. Use a soft, circular motion with your pencil to build up these dark tones gradually.
As you move toward the outer petals, lighten your touch significantly. The edges of the petals should be the brightest parts of your drawing, often catching the most light. To create a realistic look, leave small white gaps between the petals to represent highlights. If you are using graphite, use a blending stump or a clean finger to soften the transitions between your shaded areas and the highlights, creating a smooth, velvety texture.
Common mistakes when drawing peonies
One of the most frequent errors is drawing every single petal with the same amount of detail. This approach often results in a cluttered, confusing image that lacks a clear focal point. Instead, focus on the overall shape and the way the petals overlap. If every line is equally dark and bold, the viewer’s eye will not know where to look. Use varying line weights—thinner lines for the outer edges and thicker, darker lines for deep crevices.
Another common mistake is making the petals too rigid or symmetrical. Peonies are naturally wild and asymmetrical; they rarely follow a perfect, uniform pattern. Avoid drawing perfect circles or repeating the exact same U-shape for every petal. If your drawing starts to look too mechanical, intentionally add a few petals that are slightly folded or bent. This irregularity is exactly what gives the peony its characteristic charm and organic, lifelike appearance on the page.
Why peonies look complex to draw
The complexity of a peony comes from its high petal count, which can sometimes exceed fifty petals in a single bloom. When you look at a peony, your brain tries to process every single fold and ruffle simultaneously, which can be overwhelming. To simplify this, stop viewing the flower as a collection of individual petals and start seeing it as a series of light and dark masses. By grouping the petals into larger shapes, you reduce the visual noise.
Understanding the anatomy of the flower also helps simplify the process. A peony bud begins as a tight, rounded ball and gradually opens into a bowl-shaped or spherical bloom. By studying the way the petals unfurl from the center, you can predict where they should be placed in your drawing. Practice drawing the flower from different angles, such as a side view or a three-quarter view, to better understand how the petals shift and compress as the bloom matures.
Key facts
- Peonies are defined by their dense, ruffled petals, so focus on creating overlapping U-shaped curves rather than perfect circles.
- Start your drawing with a light, loose circle to act as the core, then build layers of petals outward from the center.
- Use a "C" or "U" shape for individual petals, varying the size to make the flower look natural and organic.
- Leave small gaps between some petals to suggest depth and shadows, which prevents the drawing from looking like a flat blob.
- Draw the inner petals smaller and more tightly packed, while making the outer petals larger and more relaxed.
- Avoid drawing every single petal; instead, suggest the texture by focusing on the ruffled edges and overlapping shadows.
The bottom line
Drawing a peony is an exercise in layering soft, organic shapes rather than achieving geometric precision. By establishing a central core and building outward with varied, overlapping U-shaped petals, you can capture the flower's signature ruffled appearance. Focus on using light pressure for guidelines and deeper shading to define depth, ensuring your final sketch feels voluminous, natural, and sophisticated without needing to draw every detail.
People also ask
What is the best pencil grade for sketching peonies?
An HB pencil is ideal for initial light guidelines, while a 2B or 4B pencil works best for adding depth and shading to the petals. Softer leads allow you to create darker, more dramatic shadows between the layers.
Should I use a reference photo when drawing a peony?
Using a reference photo is highly recommended because peonies have complex, multi-layered structures that are difficult to memorize. A photo helps you understand how light hits the petals and where the deepest shadows naturally occur.
How do I make the peony look three-dimensional?
You create three-dimensional volume by applying darker shading at the base of each petal where it meets the center. By keeping the edges of the petals lighter, you create a sense of curvature and depth.
Why does my peony drawing look messy?
A messy appearance often results from drawing too many lines without variation in pressure. Try to use confident, single strokes and erase your initial guide circles once the petal structure is established.
How can I draw the leaves of a peony?
Peony leaves are lance-shaped and typically grow in groups of three. Draw them with pointed tips and a central vein to contrast with the soft, rounded appearance of the flower head.
Is it better to draw from the center or the outside?
Starting from the center is usually easier because it establishes the focal point of the bloom. Once the core is set, you can expand outward, which helps you control the overall size and shape of the flower.
This answer was created with the help of AI research tools and reference sources. Spotted an error? Let us know — we correct mistakes quickly. See our editorial policy.