How do you shade anime hair?
Short answer
Shading anime hair involves defining hair clumps, establishing a light source, and applying shadows in layers. You start with a base color, add a darker tone for depth, and use a highlight to create volume. By focusing on the shape of the hair rather than individual strands, you achieve a clean, professional aesthetic.
On this page
How to plan hair shading for beginners
Before applying color, you must treat hair as a collection of solid shapes rather than individual strands. Anime hair is typically stylized into large, interconnected clumps or "ribbons." Identifying these shapes allows you to place shadows where the hair curves inward or overlaps. Start by sketching these clumps clearly to ensure your shading has a logical structure to follow.
Once the shapes are defined, establish a consistent light source. If the light comes from the top right, the shadows will naturally fall on the bottom left of each hair clump. Consistency is the most important factor in making the hair look three-dimensional. Beginners should follow these steps to organize their workflow:
- Draw the hair in distinct, oversized sections.
- Determine the direction of your primary light source.
- Map out the darkest areas where hair meets the scalp or overlaps.
- Apply a base color that covers the entire hair area.
How to choose colors for shading
Selecting the right colors prevents the hair from looking muddy or flat. Avoid using pure black or grey for shadows, as these often kill the vibrancy of the base color. Instead, shift your hue toward a cooler or warmer tone while increasing the saturation. For example, if the hair is yellow, use a saturated orange or a soft purple for the shadow to create visual interest.
To maintain a professional look, create a palette of three distinct values: the base color, the shadow color, and the highlight. The shadow should be significantly darker than the base to create contrast, while the highlight should be lighter and often more saturated. You can test your colors on a separate canvas layer to ensure they harmonize well. Many artists use a "multiply" layer mode to deepen their shadows, which allows the base color to show through and maintain color consistency across the entire illustration.
How to apply shading in layers
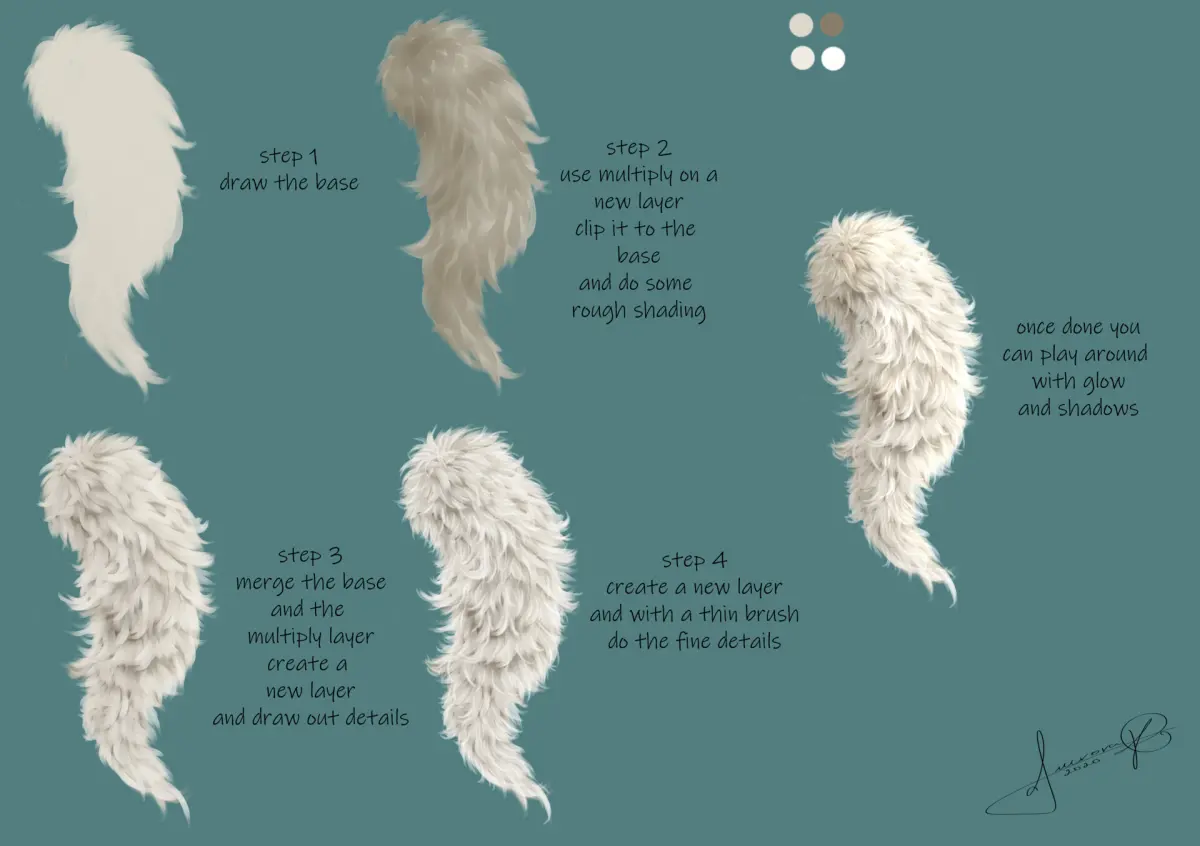
Layering is the industry standard for achieving the clean, cel-shaded look common in anime. Start by applying your base color on a flat layer. Above this, create a new layer set to "Multiply" or a similar blending mode to add your shadows. This approach keeps your work non-destructive, meaning you can easily adjust the intensity of the shadows without repainting the base.
When applying the shading, focus on the following techniques to enhance depth:
- Use a hard-edged brush to maintain the sharp, graphic style characteristic of anime.
- Add a secondary, even darker shadow at the very base of the hair clumps to suggest deep recesses.
- Place a soft "ambient light" reflection on the shadowed side to make the hair feel more integrated into the scene.
- Use a clipping mask to ensure your shadows stay strictly within the boundaries of the hair shapes you previously defined.
Why hair highlights are important
Highlights are the final touch that gives anime hair its signature glossy appearance. They represent the point where light hits the highest peak of a hair clump. Without highlights, hair often looks like dull plastic or clay. Place these highlights at the top of the head or along the curves of the bangs, following the flow of the hair strands.
The shape of the highlight should mirror the shape of the hair clump it sits on. If the hair is straight, the highlight should be a long, thin rectangle or a sharp oval. If the hair is wavy, the highlight should curve along with the hair's movement. Avoid placing highlights in the center of a shadow, as this contradicts the light source. A well-placed highlight acts as a focal point, drawing the viewer’s eye toward the character's face and adding a sense of life to the illustration.
Common mistakes when shading anime hair
One frequent error is over-shading, where artists add too many small shadows that clutter the design. Anime hair relies on simplicity; adding too much detail often makes the hair look messy or heavy. Stick to a few large, well-placed shadow shapes rather than trying to shade every single strand. If your hair looks too busy, try merging some of your shadow shapes to create larger, more cohesive blocks of color.
Another common mistake is ignoring the hair's volume. Beginners often shade hair as if it were a flat sheet of paper, forgetting that it has thickness and wraps around the head. Always consider the skull's shape underneath the hair when deciding where shadows should fall. If the hair is tucked behind an ear, the shadow should be deeper in that area. By keeping these physical realities in mind while maintaining the stylized anime aesthetic, you will create hair that looks both dynamic and grounded in the character's overall design.
Key facts
- Use a hard-edged brush for the primary shadow to maintain the distinct, stylized look characteristic of anime.
- Choose a shadow color by shifting your base color toward a cooler hue, such as adding blue or purple, rather than just increasing black.
- Establish a consistent light source before shading to ensure shadows fall logically across the hair strands.
- Apply a "cast shadow" where the hair bangs overlap the forehead to create depth and separate the face from the hair.
- Add a secondary, lighter shadow layer to create a soft gradient effect, which adds volume to individual hair clumps.
- Place a bright, white highlight at the highest point of the hair or on the curves of the bangs to simulate a glossy, clean finish.
The bottom line
Shading anime hair effectively requires a balance between bold, hard-edged shadows and strategic highlights. By treating hair as large, three-dimensional volumes rather than individual strands, you can create a clean and professional look. Always define your light source first, choose cooler shadow tones to maintain vibrancy, and limit soft blending to avoid a muddy appearance. Consistency in these techniques will significantly elevate your character illustrations.
People also ask
Should I use the airbrush tool for anime hair shading?
Generally, avoid using airbrushes for the main shadows because they look too soft and muddy for the anime style. Use airbrushes only for subtle, secondary color transitions or to add a soft glow to the highlights.
How do I choose the right colors for shading?
Select a shadow color that is more saturated and cooler in temperature than your base color. Avoid using pure grey or black, as these desaturate the image and make the hair look flat and lifeless.
How many layers of shading are usually required?
Most professional anime artists use three distinct layers: a base color, a primary shadow for depth, and a secondary, darker shadow for extra contrast. Adding a final highlight layer is essential for achieving the characteristic "shiny" anime aesthetic.
What is the best way to handle highlights?
Place highlights on the top curve of the hair and along the edges of individual hair clumps. Keep them sharp and bright, but ensure they follow the flow and direction of the hair strands.
How do I make the hair look like it has volume?
Treat the hair as a collection of large, solid shapes rather than individual strands. Shade these large clumps as three-dimensional objects to create a sense of weight and fullness.
What are the most common mistakes beginners make?
Beginners often shade too randomly without considering the light source, leading to inconsistent shadows. Another common error is using a color that is too dark or too light, which ruins the balance of the character design.
This answer was created with the help of AI research tools and reference sources. Spotted an error? Let us know — we correct mistakes quickly. See our editorial policy.