How do you draw a stork?
Short answer
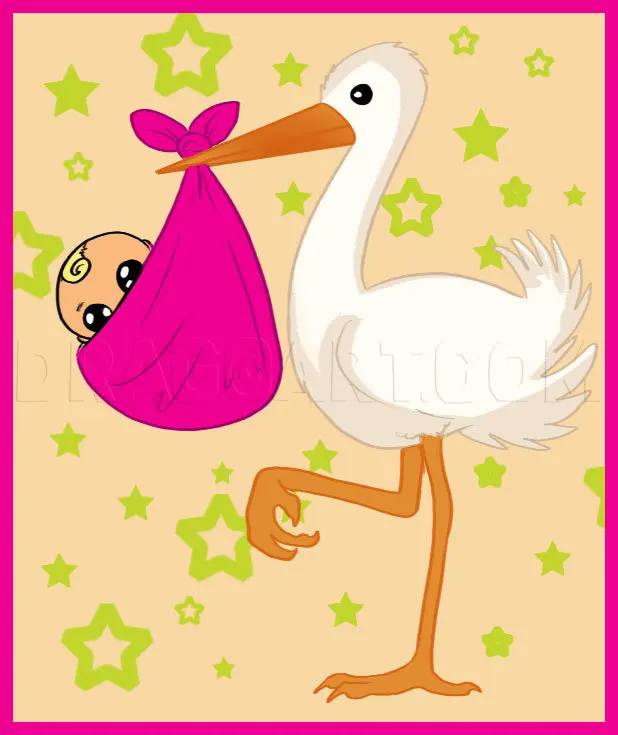
Drawing a stork requires focusing on its distinct silhouette: a long, slender neck, a sharp, pointed beak, and exceptionally long, thin legs. Start by sketching basic geometric shapes to establish the bird's posture, then refine the contours. Emphasize the elegant curve of the neck and the contrast between the body and legs.
On this page
How to sketch the basic stork anatomy
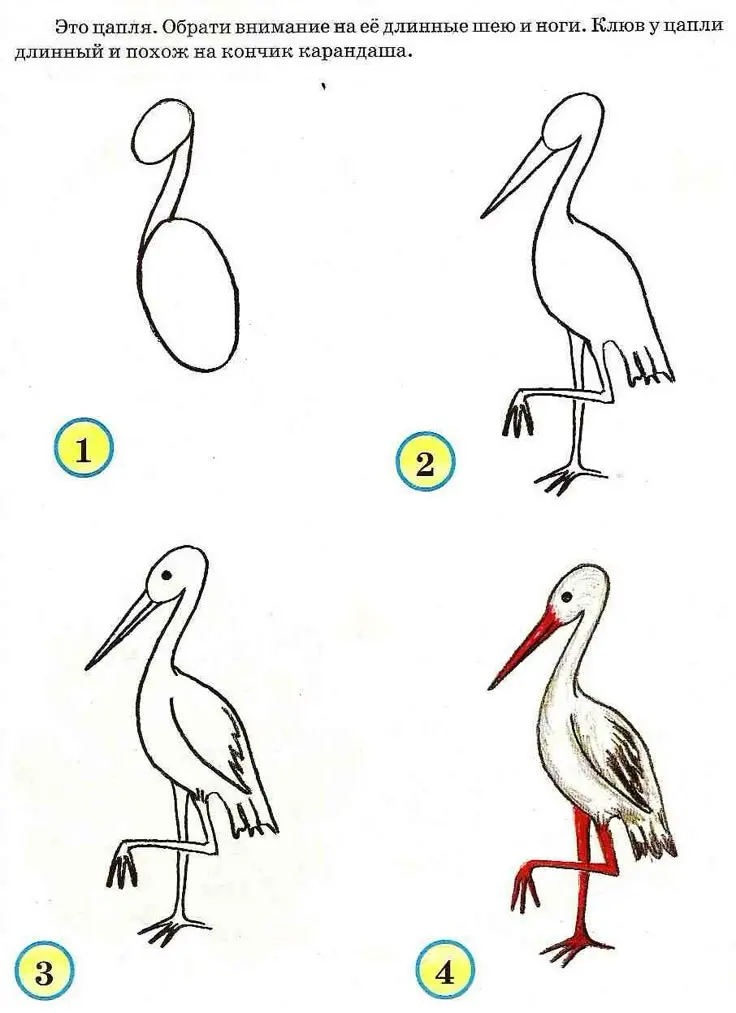
To draw a realistic stork, start by visualizing the bird as a collection of simple shapes. Begin with a large oval for the main body, placed at a slight angle. Add a smaller circle above it for the head and connect them with a long, graceful "S" curve to represent the neck. This skeletal framework ensures the proportions remain accurate before you add details like feathers or facial features.
When positioning the legs, remember that they should originate from the lower center of the body oval. Storks are known for their height, so these lines must be significantly longer than the torso itself. Keep the joints simple at this stage, marking the knees with small circles to help you place the lower leg segments correctly later.
- Draw an oval for the body.
- Add a circle for the head.
- Connect the head and body with an "S" curve.
- Sketch two long lines extending downward for the legs.
- Add a long, wedge-shaped triangle for the beak.
Best drawing techniques for beginners
Beginners often struggle with the stork's beak, which is a defining feature of the bird. Instead of drawing a simple line, visualize the beak as a long, heavy, and slightly tapered wedge. It should be thick at the base where it meets the skull and taper to a sharp point. Adding a subtle curve to the top mandible creates a more natural, lifelike appearance compared to a perfectly straight line.
Focusing on the negative space around the neck is another excellent technique for beginners. By looking at the gap between the neck and the body rather than just the lines of the neck itself, you can achieve a more fluid and accurate curve. Use light, sketchy lines initially so you can easily erase and adjust the proportions as you refine the shape.
- Use a hard graphite pencil (like an H or HB) for the initial layout.
- Keep your hand loose to create sweeping, elegant curves for the neck.
- Compare the length of the beak to the size of the head to maintain scale.
- Practice drawing the "S" curve separately several times to build muscle memory.
Why the stork's posture is important
The posture of a stork conveys its natural elegance and alertness. These birds are often depicted standing on one leg, a common resting position that helps them conserve body heat. When drawing this, ensure the weight of the bird is balanced over the supporting leg. The bent knee of the raised leg should be tucked close to the body, creating a compact and stable silhouette that feels grounded.
If you are drawing the stork in motion, focus on the tension in the neck and the position of the wings. A stork taking flight requires a wider stance and a more horizontal body position. The neck should be extended forward, and the legs should trail behind to act as a rudder. Capturing this directional flow is essential for creating a dynamic drawing that feels active rather than static.
Common mistakes when drawing storks
One of the most frequent errors is making the legs too short or too thick. Storks are wading birds with spindly, reed-like legs that provide a stark contrast to their substantial bodies. If the legs appear sturdy or muscular, the drawing will look more like a goose or a crane. Always aim for a delicate, stick-like appearance to maintain the bird's characteristic grace.
Another common mistake involves the placement of the eye relative to the beak. The eye should be positioned slightly above the base of the beak, often surrounded by a patch of bare skin. Placing the eye too far back on the head gives the stork a cartoonish or unnatural look. Pay close attention to the transition between the feathers of the head and the hard surface of the beak.
- Avoid drawing the legs as uniform cylinders; taper them toward the feet.
- Do not make the neck too thick; it should be slender and flexible.
- Ensure the beak is long enough to look proportional to the large body.
- Watch for "stiff" joints; use soft, rounded lines for the knees and ankles.
How to add texture and detail
Once the structure is solid, you can add texture to suggest feathers and skin. Use short, overlapping strokes on the body to imply the layered nature of plumage. Keep these strokes sparse on the neck and legs, where the skin is smoother and more visible. A few well-placed shadows under the wings or along the belly will help give the drawing a three-dimensional quality that pops off the page.
Finally, consider the contrast between the stork's white body and its black flight feathers. If you are using color or shading, keep the body light and focus your darkest values on the wingtips and the beak. This contrast is a key identifier for many stork species, such as the White Stork. By carefully managing these values, you create a professional-looking illustration that captures the essence of the bird's unique appearance and physical presence.
Key facts
- Storks are characterized by long, slender legs and a heavy, straight bill used for hunting in wetlands.
- When drawing the body, start with a large, elongated oval shape tilted at a slight angle to represent the torso.
- The neck should be drawn as a long, graceful "S" curve to emphasize the bird's elegant posture.
- Storks have a wingspan that can reach up to 2 meters, so draw the folded wings as a sharp, triangular shape against the body.
- Focus on the eye placement; it should be located near the base of the long, tapered beak rather than the center of the head.
- Avoid drawing the legs as straight sticks; include a noticeable backward-bending joint, which is the bird's ankle, positioned halfway down the leg.
The bottom line
Drawing a stork effectively requires capturing its signature long-legged silhouette and straight, powerful beak. By focusing on the graceful "S" curve of the neck and the sharp, angular joints of the legs, you can create a realistic representation. Remember to keep the feather details minimal and focus on the overall posture to ensure your drawing remains elegant, accurate, and recognizable as this iconic wetland bird.
People also ask
How do I make the stork look like it is standing in water?
Draw horizontal, wavy lines across the bottom of the legs to simulate ripples. Ensure the legs disappear behind these lines to create the illusion of depth.
Should I draw the stork with its beak open or closed?
Storks often hunt with their beaks slightly parted or ready to snap shut. Drawing a small gap between the upper and lower mandibles adds a sense of action to your sketch.
What is the best way to draw the stork's feathers?
Do not draw every individual feather, as this creates a cluttered look. Instead, use light, overlapping U-shaped strokes on the wings to suggest texture and volume.
How do I draw the stork's feet correctly?
Storks have four toes, with three pointing forward and one small one pointing backward. Keep the toes long and thin to match the bird's delicate appearance.
Why does my stork drawing look like a flamingo?
Flamingos have a much more dramatic, downward-curving beak and a distinct neck hook. Keep the stork's beak straight and its neck curve more subtle to ensure the correct species identification.
Is there a specific color palette for a white stork?
Use pure white for the body, but add light gray shadows under the wings and neck to provide dimension. The beak and legs should be colored in shades of bright orange or red.
This answer was created with the help of AI research tools and reference sources. Spotted an error? Let us know — we correct mistakes quickly. See our editorial policy.