How do you draw a camel?
Short answer
Drawing a camel involves breaking its complex anatomy into simple geometric shapes like circles and ovals. You begin by sketching the humps and torso, then adding the long, curved neck and sturdy, pillar-like legs. Focus on the distinctive facial features and textures to bring the desert animal to life on paper.
On this page
How to structure a camel drawing
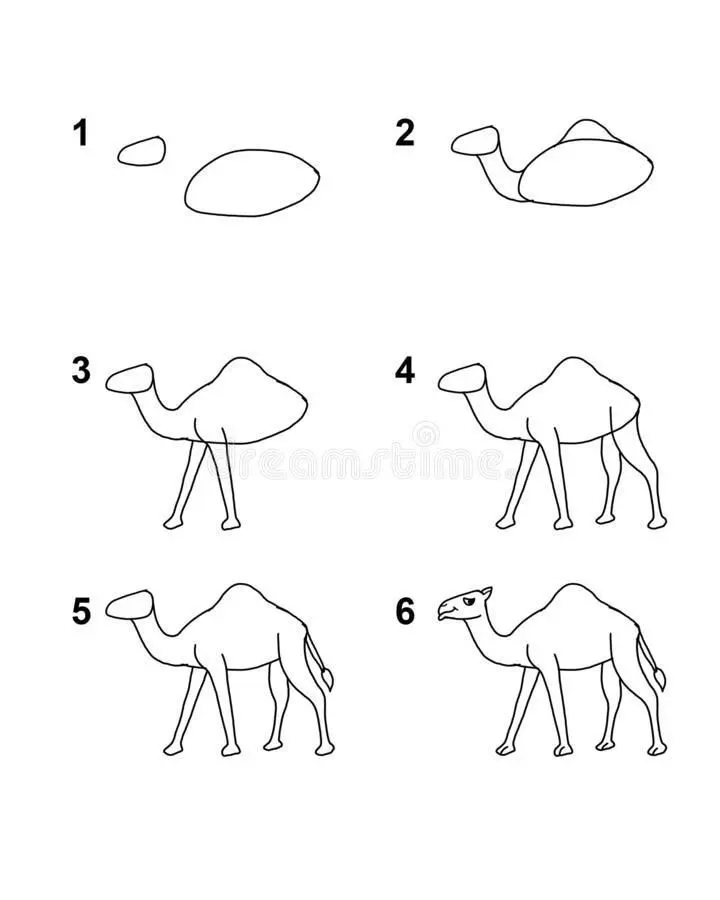
To draw a camel accurately, you must first establish its proportions using basic shapes. Start by drawing two large ovals for the body: one for the chest and a slightly larger one for the hindquarters. Connect these with a curved line to suggest the back, then place either one or two smaller, rounded triangles on top depending on whether you are drawing a Dromedary or a Bactrian camel.
Next, add a smaller circle for the head and a long, S-shaped tube to connect it to the chest. This structure provides the foundation for the camel's iconic silhouette. Keep your initial pencil lines very light, as these are merely guides that will be erased or covered later. Focusing on these geometric relationships ensures that the final drawing maintains the correct balance and scale of the animal's massive frame.
Best tools for beginners
For those starting out, a standard HB graphite pencil is the most versatile tool. It allows for light sketching and darker detailing without smudging too easily. Pair this with a kneaded eraser, which can be molded into precise points to lift graphite from small areas, such as the highlights in the eyes or the texture of the fur.
Using a smooth-surfaced drawing paper is recommended to prevent the grain from interfering with fine lines. You should also have a sharpener nearby, as keeping your pencil tip sharp is essential for defining the camel's facial features and the joints of its legs. Consider these essential supplies:
- HB and 2B graphite pencils for varying line weights.
- A kneaded eraser for clean corrections.
- A high-quality sketchbook with at least 80lb paper weight.
- A blending stump or soft tissue to smooth out shadows.
How to draw camel legs and feet
Camel legs are deceptively long and sturdy, often appearing knobby at the joints. When drawing them, represent the upper leg as a thick cylinder that tapers toward the knee, followed by a thinner lower section. The feet should be drawn as wide, padded ovals, as camels possess broad, two-toed feet designed to distribute their weight across shifting desert sands.
- Draw the front legs slightly straighter than the back legs.
- Add a slight bend at the "knee" joint to show movement or weight distribution.
- Ensure the feet are large enough to support the animal's heavy body mass.
- Add small, curved lines at the base of the feet to represent the tough, leathery pads.
Avoid making the legs look like simple sticks, as they require volume to convey the strength necessary for carrying heavy loads across long distances.
Why camel humps vary in shape
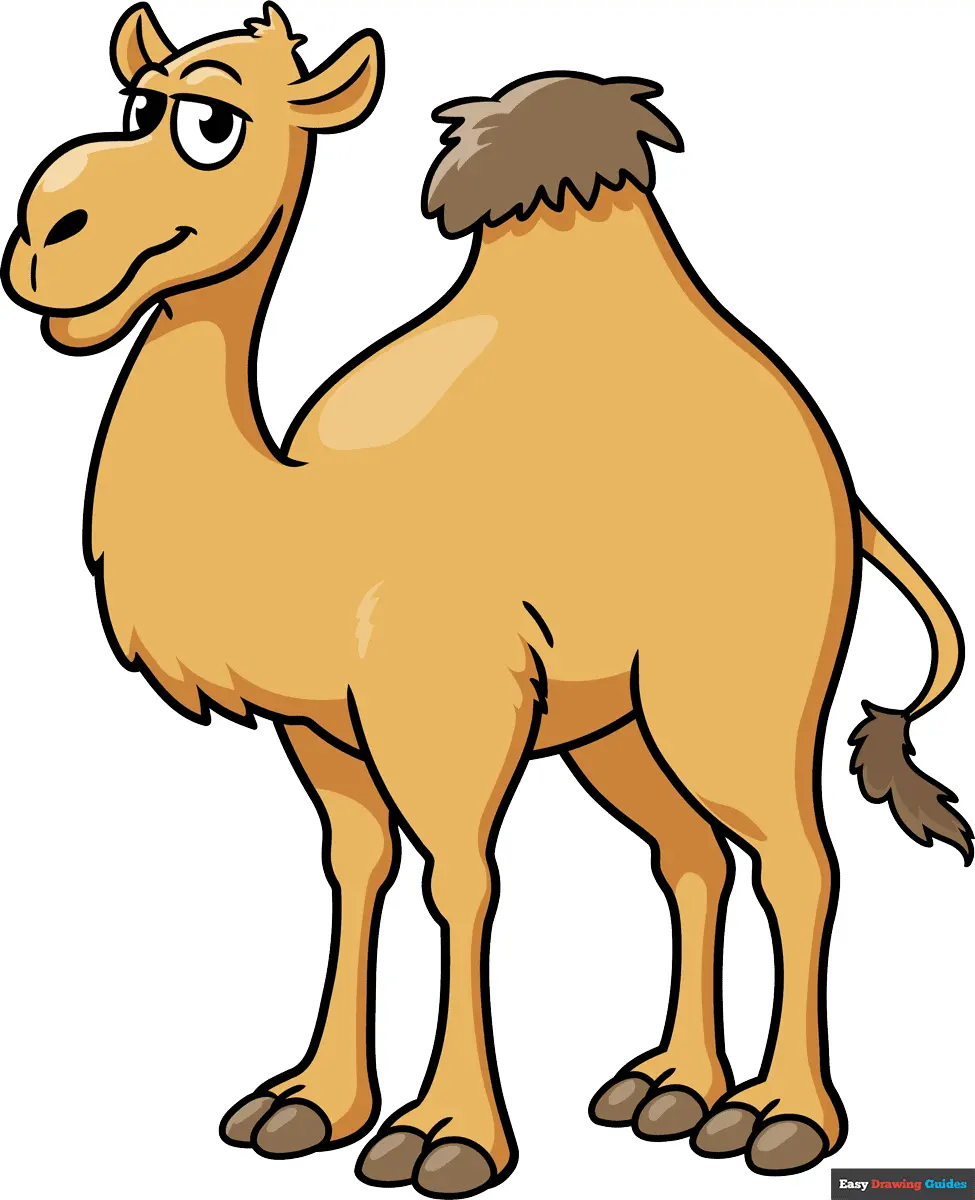
Understanding the difference between the two main species is crucial for an accurate drawing. The Dromedary camel, native to the Middle East and North Africa, has a single hump. The Bactrian camel, found in Central Asia, features two humps. When sketching, observe how the weight of the hump causes the skin to drape slightly over the animal's back, creating a natural, rounded slope rather than a sharp, geometric peak.
The humps are primarily composed of stored fat, which provides energy during periods of food scarcity. Because this fat content fluctuates, the humps can appear firm and upright when the animal is well-fed or saggy and deflated if the camel is malnourished. When drawing, you can add depth by shading the base of the hump to show where it meets the torso, which creates a more realistic, three-dimensional effect.
Common mistakes when drawing camels
A frequent error is drawing the neck too short or too rigid. A camel’s neck is highly flexible and should have a distinct, graceful curve that transitions smoothly into the head and chest. Another common oversight is neglecting the facial details, such as the long, thick eyelashes and the split upper lip, which are defining characteristics of the species.
To improve your technique, avoid these common pitfalls:
- Drawing the head too small, which makes the neck look disproportionately long.
- Forgetting to add the tufts of hair on the crown of the head or the throat.
- Making the legs perfectly vertical, which ignores the natural stance of a living creature.
- Using heavy, dark outlines that flatten the image instead of using shading to define volume.
By observing real-life photographs and focusing on the interplay of light and shadow, you will gradually develop the ability to render the complex textures of a camel’s coat and the unique structure of its body with increasing confidence and artistic accuracy.
Key facts
- Camels have two distinct humps if they are Bactrian, but only one hump if they are Dromedary.
- Always draw the legs with an inverted "V" shape at the joints to mimic their unique skeletal structure.
- The neck should be long and curved, resembling an elongated "S" shape to provide balance.
- Use horizontal ovals to sketch the body, ensuring the chest area is deeper than the hindquarters.
- Camel feet are wide and padded, so draw them as flat, rounded shapes rather than sharp hooves.
- Adding a tuft of hair at the end of the tail and under the chin adds realistic texture.
The bottom line
Drawing a camel requires careful attention to its unique anatomy, specifically the humps, the S-shaped neck, and the wide, padded feet. By starting with basic oval shapes for the body and mapping out the joints before adding detail, you can create a balanced and accurate depiction. Practice observing the distinct differences between Dromedary and Bactrian species to ensure your final drawing captures the correct physical characteristics.
People also ask
Should I draw the camel standing or sitting?
Drawing a standing camel is easier for beginners because it clearly shows the leg joints and proportions. Sitting camels involve complex folded limbs that can be difficult to map out accurately.
How do I make the camel look realistic?
Focus on the curvature of the neck and the specific shape of the head, which features a prominent nose and drooping lips. Adding small, almond-shaped eyes and rounded ears will provide the necessary personality.
Why do my camel drawings look like horses?
Horses have slender legs and a different neck angle compared to camels. To fix this, emphasize the camel's bulky body, thick neck, and the distinct slope of the back toward the tail.
What is the most common mistake when drawing a camel?
Many people forget the camel's heavy, padded feet and draw them like thin, pointed hooves. Always ensure the feet look soft and wide enough to support the animal on sand.
Do I need to draw the eyelashes?
Yes, long eyelashes are a defining feature of camels that protect their eyes from desert sand. Including them adds a significant amount of detail and character to your drawing.
How much space should the hump take up?
The hump should sit squarely on the back, occupying roughly one-third of the total body length. Avoid making it too small, as it is the most recognizable feature of the animal.
This answer was created with the help of AI research tools and reference sources. Spotted an error? Let us know — we correct mistakes quickly. See our editorial policy.