How do you draw a bear standing up?
Short answer
Drawing a bear standing up requires visualizing the animal as a series of simple 3D shapes. Focus on a large, pear-shaped torso, a smaller rounded head, and thick, powerful legs. By establishing these proportions first, you can add realistic fur texture and muscle definition to create a convincing, upright posture.
On this page
How to sketch the basic anatomy of a standing bear
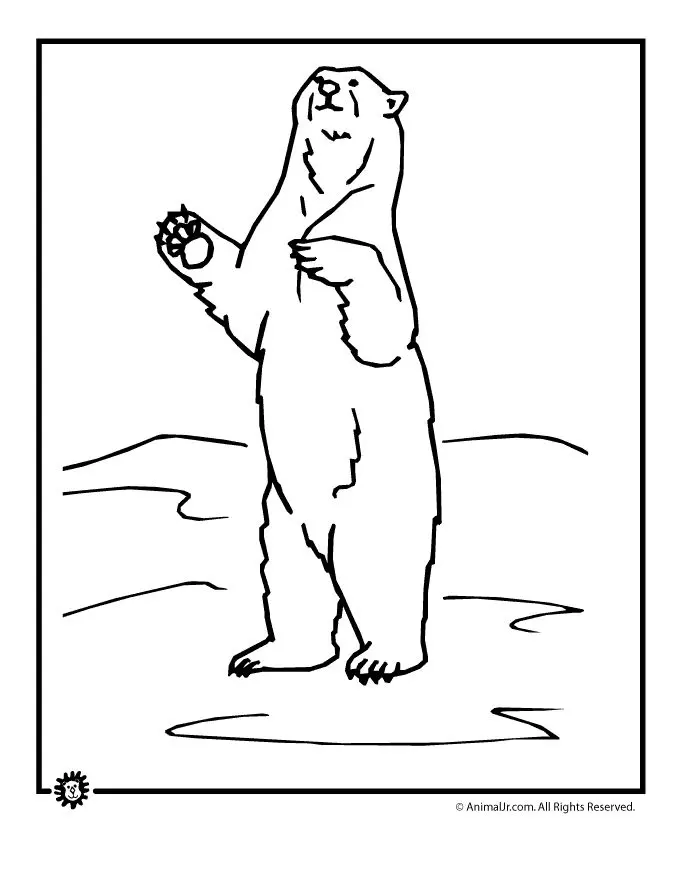
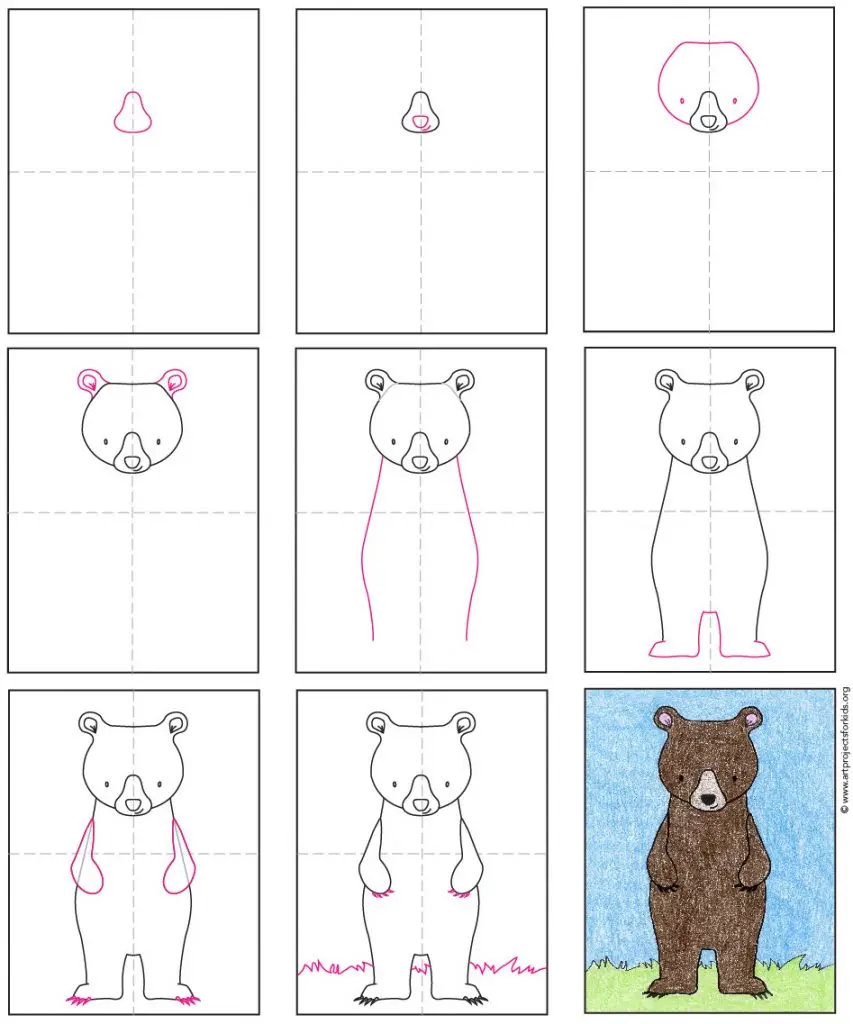
To draw a bear standing on its hind legs, start by constructing a skeletal framework using basic geometric shapes. Begin with an oval for the torso, which should be wider at the base to represent the bear's heavy, muscular hips. Place a smaller, circular shape above it for the chest and shoulders, and a smaller oval for the head. Connect these shapes with a curved spine line to indicate the bear's posture. Because bears are digitigrade, their feet are long and flat, which helps provide balance when they rise.
- Draw a vertical line to establish the bear's height and center of gravity.
- Sketch a large, teardrop-shaped oval for the lower body and hips.
- Add a smaller, rounded rectangle for the chest area, angling it slightly forward.
- Place a circle for the head, ensuring it aligns with the upper chest.
- Sketch two thick, pillar-like shapes for the hind legs, adding a slight bend at the knees.
How to add realistic limbs and paws
Once the torso is established, focus on the limbs. A standing bear’s arms should hang naturally or be slightly raised, depending on the desired action. The upper arms are thick and muscular, tapering down to the forearms. When drawing the paws, remember that bears have five toes with long, non-retractable claws. These claws are a defining feature that adds character to the drawing. Avoid making the arms look too thin, as bears possess immense muscle mass even in a relaxed, upright position.
- Keep the upper arms close to the body to emphasize the bear's bulk.
- Draw the hind feet with a flat, plantigrade appearance, similar to human feet but thicker.
- Ensure the claws are visible and slightly curved, extending from the end of each toe.
- Use overlapping lines where the joints meet to suggest the thickness of the fur and muscle underneath.
Why proportions matter for a standing bear
Proportions are the most critical factor in making your bear look authentic rather than cartoonish. A common error is making the head too small or the legs too spindly. Bears are top-heavy animals with a significant amount of fat and muscle around the neck and shoulders. When standing, the bear’s center of gravity shifts, so the hind legs must appear sturdy enough to support the weight of the upper body. Aim for a "triangular" silhouette where the base is broad and the head is relatively compact.
If the head is too large, the bear will look like a caricature; if it is too small, the bear will lose its predatory presence. Always check that the distance from the hip to the ground is roughly equal to the length of the torso. This balance ensures the bear looks like it could realistically sustain its upright position for a moment of observation or defense.
Common mistakes when drawing bear fur
Many beginners make the mistake of drawing individual hairs everywhere, which results in a messy, cluttered appearance. Instead, focus on the "flow" of the fur. Fur on a bear is thickest around the neck and shoulders, creating a distinct ruff. Use short, quick strokes to indicate texture only at the edges of the silhouette and in areas where the body bends, such as the armpits or the base of the neck. This technique suggests volume without overwhelming the viewer with unnecessary detail.
- Avoid drawing lines through the center of the body, as this flattens the form.
- Use varying stroke lengths to show how fur clumps together in different directions.
- Keep the middle of the chest and belly relatively smooth, as fur there is often shorter or matted.
- Add shadows under the arms and between the legs to create depth and emphasize the bear's physical mass.
How to add shading and final details
Shading is the final step to bring your bear to life. Determine where your light source is coming from, then apply shadows to the opposite side of the bear’s body. Because bears have dark, dense fur, you should use a wide range of values, from deep blacks in the shadows to lighter grays where the light hits the top of the head or shoulders. Pay attention to the snout, which is usually lighter in color and lacks the dense fur found on the rest of the body.
Refine the eyes and nose by adding small highlights to give them a wet, realistic look. The eyes should be small and dark, set deep within the fur. Finally, clean up your construction lines and add a ground shadow beneath the feet to anchor the bear firmly to the surface. By focusing on these subtle details, you transform a simple outline into a powerful, three-dimensional representation of a bear standing in its natural environment.
Key facts
- A bear standing on its hind legs is called "bipedal" posture and is used for better scent detection or intimidation.
- Start your drawing by sketching an oval for the head and a larger, pear-shaped oval for the torso to establish the center of gravity.
- The hind legs should be drawn with a slight bend at the knees, as bears do not lock their joints while standing.
- Ensure the front paws are held loosely at chest or shoulder height, as bears do not hold their arms stiffly like humans.
- Focus on the "hump" of muscle over the shoulders, which is a defining anatomical feature of grizzly bears.
- Avoid drawing human-like fingers; bear paws have five toes with thick, non-retractable claws that should be clearly visible.
The bottom line
Drawing a standing bear requires balancing its massive, muscular frame with its unique plantigrade anatomy. By focusing on the characteristic shoulder hump and the slight bend in the hind legs, you can capture the animal's natural weight and posture. Remember that a bear’s bipedal stance is a functional tool for observation, so keeping the arms relaxed and the claws prominent will ensure your drawing remains anatomically accurate.
People also ask
Do bears stand up to attack?
Bears typically stand on their hind legs to get a better view of their surroundings or to catch a scent. It is rarely an aggressive gesture and is more often a sign of curiosity or an attempt to assess a potential threat.
How do you draw realistic bear fur?
Use short, directional strokes that follow the contours of the bear's body rather than drawing individual hairs. Focus on shading the areas where the fur is thicker, such as the neck and shoulders, to create a sense of volume.
What is the difference between a grizzly and a black bear's silhouette?
A grizzly bear has a prominent shoulder hump and a concave, or "dished," facial profile. Black bears lack this shoulder hump and possess a straighter, more rounded facial profile.
Should I include a horizon line in my drawing?
Including a horizon line helps ground the bear in a physical space, preventing it from appearing to float. Place the line behind the bear's feet to establish a clear sense of scale and perspective.
Why do bears look clumsy when standing?
Bears are plantigrade animals, meaning they walk on the soles of their feet like humans. Because their anatomy is built for quadrupedal movement, their bipedal posture is temporary and naturally appears slightly awkward.
How can I make the bear look more intimidating?
To increase the intensity, draw the mouth slightly open to reveal teeth and tilt the ears back against the head. Adding a wider stance and a lower brow ridge will also give the animal a more aggressive appearance.
This answer was created with the help of AI research tools and reference sources. Spotted an error? Let us know — we correct mistakes quickly. See our editorial policy.