What is botanical illustration?
Short answer
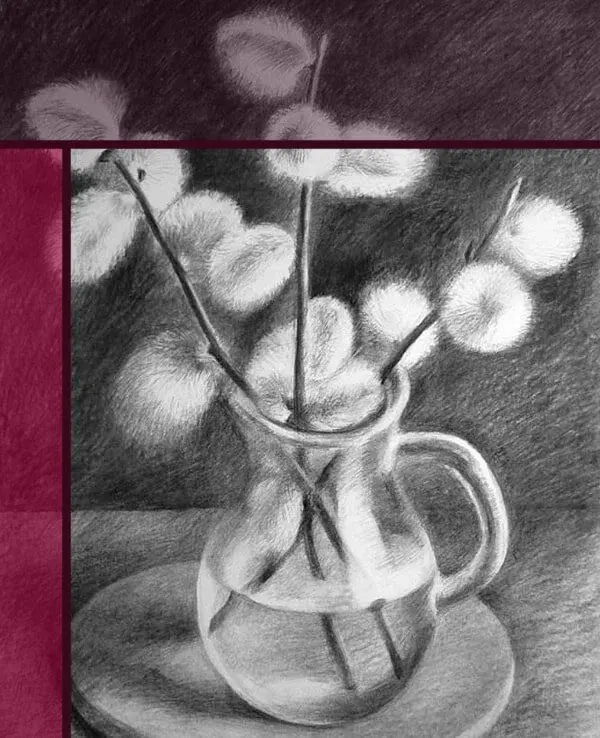
Botanical illustration is the art of depicting the form, color, and details of plant life with scientific accuracy. Unlike purely decorative floral art, it emphasizes diagnostic features—such as leaf arrangement, root systems, and reproductive parts—to aid in the identification and classification of species for botanical research and historical documentation.
On this page
What is the history of botanical illustration?
Botanical illustration dates back to antiquity, primarily serving the medical field. Early herbals, such as the Codex Vindobonensis from 512 CE, featured drawings intended to help physicians identify medicinal plants. During the Renaissance, the invention of the printing press and the Age of Discovery fueled a demand for accurate visual records of exotic flora brought back from global expeditions.
By the 18th and 19th centuries, the field reached a golden age. Artists like Pierre-Joseph Redouté, known as the "Raphael of flowers," utilized stipple engraving to capture the delicate textures of roses and lilies. These works transitioned from purely utilitarian medical guides to exquisite records of biodiversity. Today, the tradition continues to thrive through organizations like the American Society of Botanical Artists, which balances aesthetic beauty with the rigorous demands of scientific observation.
How to start botanical illustration for beginners
Beginning a botanical study requires patience and a focus on observation rather than artistic flair. You must learn to "see" the plant, noting the specific angle of a leaf attachment or the exact number of petals. Start by choosing a single specimen, such as a dried leaf or a seasonal flower, and observe it under strong, consistent lighting to understand its structure.
- Select a live specimen to observe the natural growth habit.
- Use a magnifying glass to inspect small details like stamen count or hair patterns on the stem.
- Lightly sketch the overall silhouette using a hard graphite pencil (2H or 4H).
- Gradually build up the form, focusing on the geometry of the plant parts before adding fine details.
- Apply color in thin, transparent layers to mimic the depth of natural pigments.
What are the essential tools for botanical artists?
Professional results depend on high-quality materials that allow for precision and longevity. Artists typically prefer hot-pressed watercolor paper, which has a smooth surface that prevents fine lines from bleeding or skipping. Graphite pencils are essential for the initial layout, while high-quality watercolor pans or tubes are used for the final rendering of color and texture.
- Hot-pressed watercolor paper (300gsm weight) for a smooth finish.
- Professional-grade watercolor paints with high lightfastness ratings.
- Sable or synthetic-sable brushes in sizes 000 to 4 for fine detail work.
- A drafting compass or calipers for measuring plant proportions accurately.
- A white vinyl eraser for clean corrections without damaging the paper surface.
Investing in archival-quality materials ensures that your work remains vibrant and does not yellow over time. Cheap paper often absorbs pigment unevenly, making it difficult to achieve the subtle gradients required for realistic botanical modeling.
Why scientific accuracy matters in botanical art
Scientific accuracy is the defining characteristic that separates botanical illustration from general floral painting. An illustrator must capture the "diagnostic features" of a plant—the specific traits that distinguish one species from another. If a plant has serrated leaf edges, for example, the drawing must clearly show the pattern and depth of those serrations rather than generalizing them into a smooth line.
This precision is vital for taxonomists who use illustrations to identify species when live specimens are unavailable or seasonal. An artist might include a "dissection" on the page, showing a cross-section of a fruit or an enlarged view of a seed pod. These supplementary drawings provide information that a photograph often misses, as the illustrator can emphasize key characteristics while de-emphasizing distracting background elements. The goal is to provide a comprehensive, clear, and objective visual summary of the plant's life cycle.
Common mistakes when drawing plants
One of the most frequent errors for beginners is "drawing what they think they see" rather than what is actually there. For example, many people assume leaves are perfectly symmetrical or that colors are uniform across a stem. In reality, nature is rarely perfect; leaves often have slight tears, insect damage, or asymmetrical growth patterns that are essential to a truthful representation.
- Rushing the initial sketch: Failing to establish correct proportions leads to distorted final images.
- Overworking the paper: Applying too much water or scrubbing the surface destroys the delicate fibers of the paper.
- Ignoring light source: Failing to maintain a consistent light direction results in flat, lifeless illustrations.
- Using opaque colors: Botanical art relies on transparent layering; using heavy, opaque paint makes the plant look like plastic.
- Neglecting the root system: Many beginners omit the roots, which are often the most important part for identification.
By slowing down and verifying every measurement against the live specimen, you avoid these common pitfalls and create an illustration that is both beautiful and scientifically valid.
Key facts
- Botanical illustration is the art of depicting the form, color, and details of plant species, often for scientific purposes.
- Unlike floral art, which focuses on aesthetics, botanical illustration must be scientifically accurate to allow for plant identification.
- Artists typically use a combination of graphite, watercolor, or pen and ink to capture textures and anatomical structures.
- A standard illustration often includes a "dissection" plate showing magnified views of reproductive parts like stamens or seeds.
- The Golden Age of botanical illustration occurred during the 18th and 19th centuries, fueled by global exploration and the need to document new species.
- Beginners should avoid using "artistic license" to alter plant proportions, as accuracy remains the primary requirement of the discipline.
The bottom line
Botanical illustration bridges the gap between rigorous scientific documentation and fine art. By prioritizing anatomical precision and clarity, illustrators provide a timeless record of the plant kingdom that remains vital for research and education. Whether you are a scientist or an artist, mastering this discipline requires patience, keen observation, and a deep appreciation for the complex, structural beauty inherent in every living plant species.
People also ask
What is the difference between a botanical illustration and a botanical photograph?
An illustration can emphasize specific diagnostic features of a plant that might be obscured by shadows or depth of field in a photograph. Artists can synthesize multiple stages of a plant's life cycle into one image, providing a comprehensive view that a single snapshot cannot capture.
Do I need a degree in botany to become a botanical illustrator?
While a formal degree is not required, you must possess a strong working knowledge of plant morphology and terminology. Understanding how a plant grows is essential for creating accurate, believable depictions of its structure.
What are the most common tools used for this type of art?
Professionals typically use high-quality hot-press watercolor paper, which has a smooth surface ideal for fine detail. Artists also rely on mechanical pencils for precision, waterproof ink pens for line work, and sable brushes for applying layers of pigment.
How do artists maintain accuracy when drawing plants?
Artists often use magnifying glasses or stereomicroscopes to examine the tiny, intricate parts of a flower. They also take detailed measurements and notes on color, as natural pigments can fade quickly once a specimen is removed from the soil.
What is the most common mistake made by beginners?
A frequent error is failing to observe the "habit" or natural posture of the plant, leading to drawings that look stiff or unnatural. Beginners often focus too much on the flowers while neglecting the essential structure of the stems and leaves.
Where can I find specimens to practice drawing?
Local botanical gardens, nurseries, and even your own backyard are excellent places to find subjects. Always ensure you have permission to collect samples, or simply sketch the plant in its natural environment to avoid damaging it.
This answer was created with the help of AI research tools and reference sources. Spotted an error? Let us know — we correct mistakes quickly. See our editorial policy.