What is screen printing?
Short answer
Screen printing is a versatile stencil-based printing technique that forces ink through a fine mesh screen onto a substrate, such as fabric, paper, or wood. By blocking specific areas of the screen with a stencil, artists create detailed, durable designs. It is widely used for producing custom apparel, posters, and industrial signage.
On this page
How does screen printing work?
Screen printing, also known as serigraphy or silkscreen printing, relies on the principle of a stencil. A mesh screen is stretched tightly over a frame, typically made of wood or aluminum. A light-sensitive emulsion is applied to the mesh and exposed to a high-intensity light source through a film positive, which hardens the emulsion in non-image areas. When the screen is rinsed with water, the unexposed emulsion washes away, leaving a porous stencil that allows ink to pass through onto the printing surface.
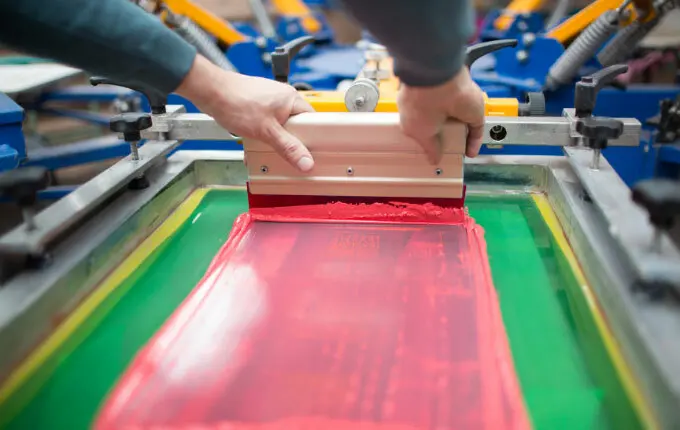
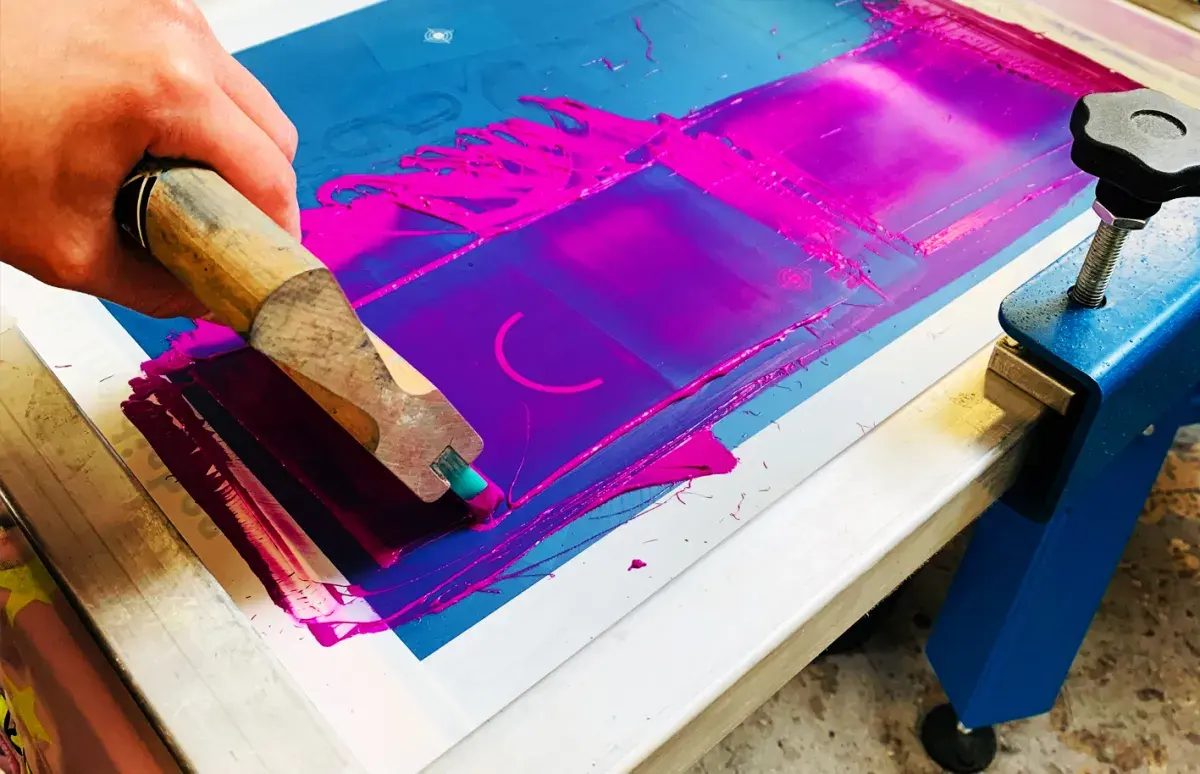
To transfer the image, the screen is placed directly over the substrate. A rubber squeegee is then pulled across the screen with firm, even pressure. This action forces the ink through the open mesh apertures, depositing a thick, vibrant layer of color onto the material. Because the ink sits on top of the fibers rather than soaking in, the results are highly opaque and resistant to fading, making this method superior for printing light-colored designs on dark fabrics.
What materials do you need to start?
Setting up a screen printing station requires a few essential components to ensure professional results. For beginners, a small tabletop press or even a simple hinged frame is sufficient to maintain registration, which ensures that multiple colors align perfectly. You must select the appropriate mesh count for your project; a lower count, such as 110, is ideal for thick inks and heavy fabrics, while a higher count, like 230, is better for fine detail and thinner inks.
- A sturdy screen with a mesh count appropriate for your design.
- A squeegee with a durometer rating matching your ink type.
- Light-sensitive emulsion and a scoop coater for even application.
- Plastisol or water-based ink specifically formulated for screen printing.
- A light box or high-wattage bulb for exposing the stencil.
- A squeegee, masking tape, and a source of running water for cleaning.
How to screen print at home
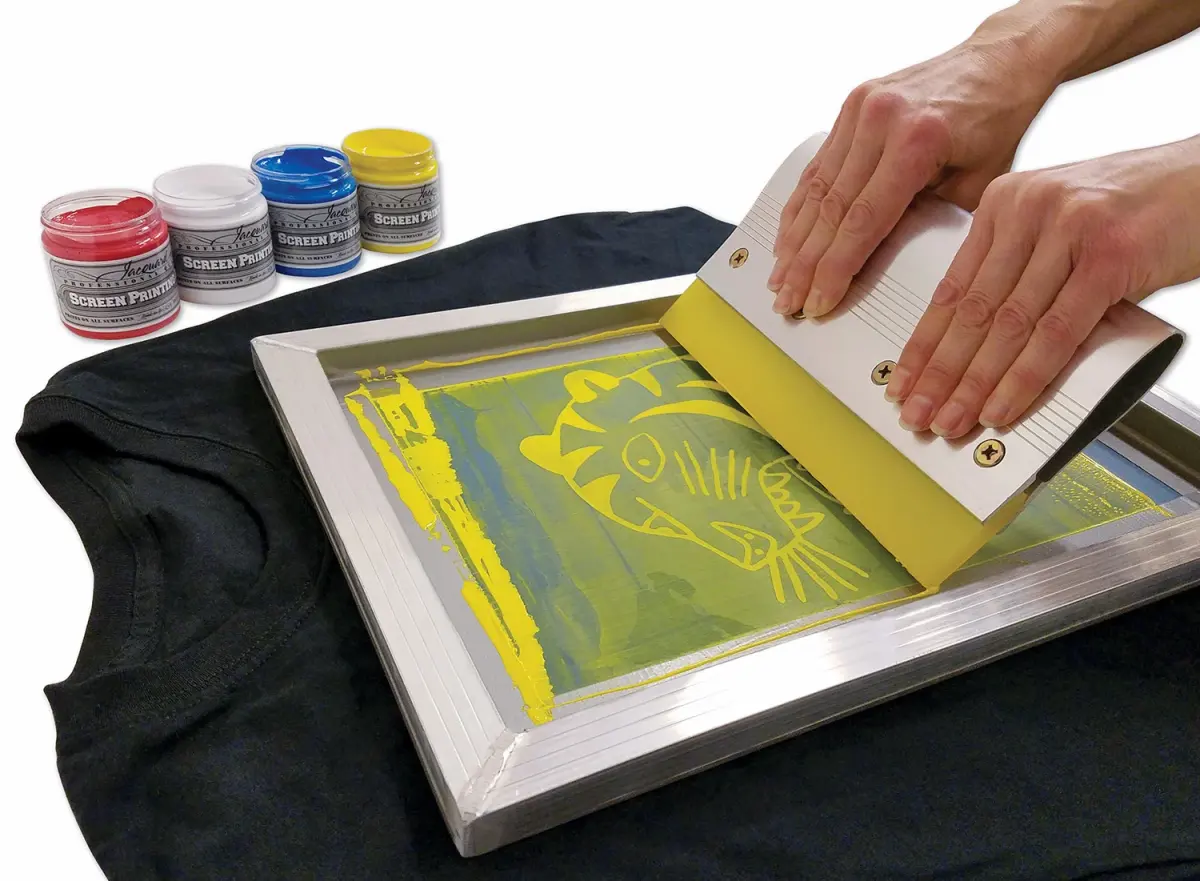
The process of printing a design follows a precise sequence to ensure the stencil remains intact and the ink transfers cleanly. Preparation is the most critical phase, as any dust or debris on the screen can cause pinholes in your final print. Always ensure your workspace is clean and well-ventilated, especially when working with certain chemical inks or cleaning solvents.
- Coat the screen with light-sensitive emulsion in a dark room and let it dry completely.
- Place your printed design film on the screen and expose it to light for the recommended duration.
- Rinse the screen with water to wash away the unexposed emulsion, revealing your stencil.
- Secure the screen to your printing surface and apply a bead of ink at the top.
- Pull the squeegee across the screen at a 45-degree angle to push the ink through the mesh.
- Lift the screen carefully and cure the print using a heat press or conveyor dryer to set the ink.
Common mistakes when screen printing
Even experienced printers encounter issues that can ruin a batch of products. One of the most frequent errors is "bleeding," which occurs when the screen is not held tightly against the fabric or when too much ink is applied. This results in blurry edges and lost detail. Another common issue is "clogging," where ink dries inside the mesh apertures during a long printing run. This typically happens if the environment is too hot or if the printer takes too many breaks without clearing the screen.
- Applying too much pressure, which forces excess ink under the stencil edges.
- Using a screen that has not been properly degreased, preventing the emulsion from adhering.
- Failing to "flood" the screen, which is the act of pulling ink across the mesh without pressure to keep the stencil moist.
- Under-curing the ink, which leads to the design washing off after the first laundry cycle.
- Using an incorrect off-contact distance, which is the tiny gap between the screen and the fabric.
Why use screen printing over other methods?
Screen printing remains the industry standard for apparel and promotional items because of its unmatched durability and color vibrancy. Unlike digital printing, which often uses thin, dye-based inks, screen printing uses heavy-duty pigments that create a tactile, raised finish. This makes it the preferred choice for high-volume orders, such as band merchandise or corporate uniforms, where longevity and brand visibility are paramount. The ability to print on various surfaces—including glass, metal, wood, and plastic—adds to its utility in both artistic and industrial applications.
Furthermore, screen printing is highly cost-effective for large production runs. Once the screen is created, the cost per unit drops significantly, making it more economical than digital methods for printing hundreds of shirts. While the initial setup time is longer due to the need for stencil creation and screen preparation, the speed of the actual printing process is much faster. This efficiency, combined with the ability to create bold, opaque graphics that withstand years of wear, ensures that screen printing remains a vital craft in the modern world.
Key facts
- Screen printing, also known as serigraphy or silkscreen printing, is a stencil-based method that forces ink through a fine mesh screen onto a substrate.
- The process originated in China during the Song Dynasty (960–1279 AD) and was later refined in the West during the early 20th century.
- Modern screens are typically made of polyester mesh stretched over a wooden or aluminum frame, with thread counts ranging from 80 to 300 per inch.
- A light-sensitive emulsion is applied to the screen and exposed to UV light to create a stencil, which blocks areas where ink should not pass.
- Each color in a design requires its own individual screen, making the process most cost-effective for high-volume production runs.
- Common substrates for screen printing include textiles like cotton t-shirts, as well as paper, wood, glass, metal, and plastic.
The bottom line
Screen printing remains a cornerstone of the apparel and signage industries due to its unmatched durability and vibrant color output. By mastering the balance of mesh tension, stencil preparation, and proper ink curing, you can produce professional-grade prints on almost any surface. While it requires more setup time than digital alternatives, its efficiency for bulk orders makes it the gold standard for high-quality, long-lasting custom merchandise.
People also ask
How many colors can be printed in a single design?
There is technically no limit to the number of colors, but each color requires a separate screen and a dedicated pass of the squeegee. Most commercial shops typically cap complex designs at 6 to 12 colors to manage production costs and time.
What is the difference between plastisol and water-based inks?
Plastisol ink is made of PVC particles and requires heat to cure, making it durable and opaque on dark fabrics. Water-based inks soak into the fabric fibers for a softer feel but are more challenging to work with because they can dry and clog the screen.
Can I screen print at home without professional equipment?
Yes, you can use a basic DIY setup involving a wooden frame, silk or polyester mesh, a squeegee, and a light-sensitive emulsion kit. Many hobbyists start by using paper stencils or vinyl decals to block the screen instead of using a full photographic emulsion process.
Why does the ink sometimes crack after washing?
Cracking usually occurs because the ink was not fully cured, meaning it did not reach the required temperature—typically 320°F (160°C) for plastisol—during the drying process. Always ensure your heat press or conveyor dryer is properly calibrated to the manufacturer’s specifications.
What is the most common mistake beginners make?
The most frequent error is failing to clean the screen immediately after printing, which causes ink to dry and permanently clog the mesh. Beginners also often apply too much pressure with the squeegee, which can blur the edges of the print or bleed ink under the stencil.
How long does a screen-printed design last?
When printed and cured correctly, screen-printed designs are highly durable and can withstand dozens, if not hundreds, of wash cycles. The thickness of the ink layer provides superior longevity compared to digital printing methods like direct-to-garment (DTG) printing.
This answer was created with the help of AI research tools and reference sources. Spotted an error? Let us know — we correct mistakes quickly. See our editorial policy.